|
Advertisement / Annons: |
Tutorial:
|
Contents:
Note: |
3, Setup off-axis adapter, drawings of internal distances: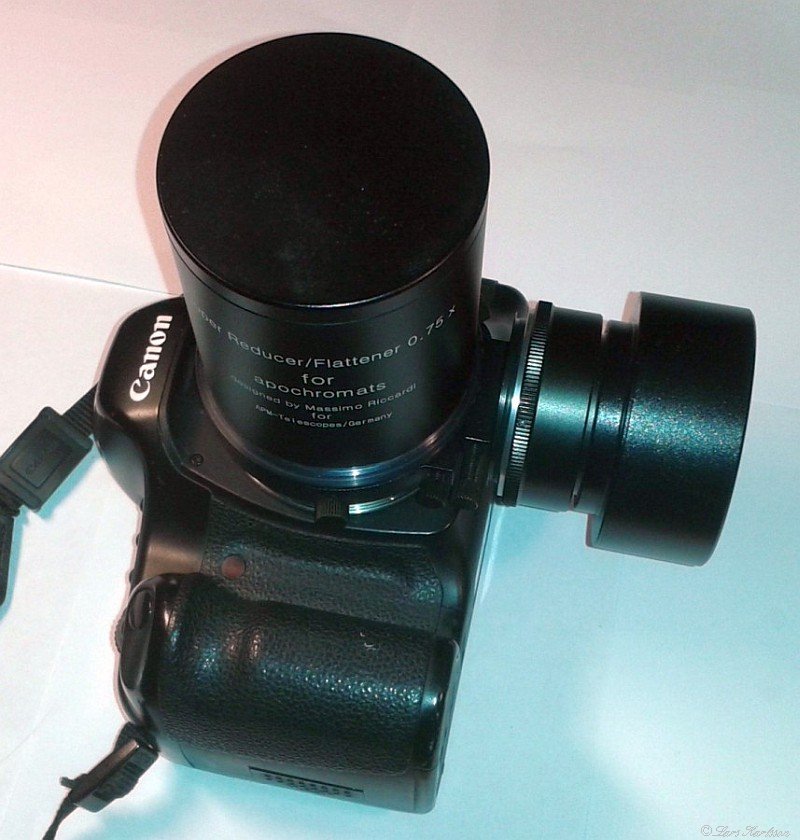
How my own setup looks with the 2.5" field flatter attached. It's very compact and the field flatter has a 0.75x reducer builtin. It can handle up to 35 mm image circle, not the full frame's needed 44 mm, it needs a 3" field flatter for that. 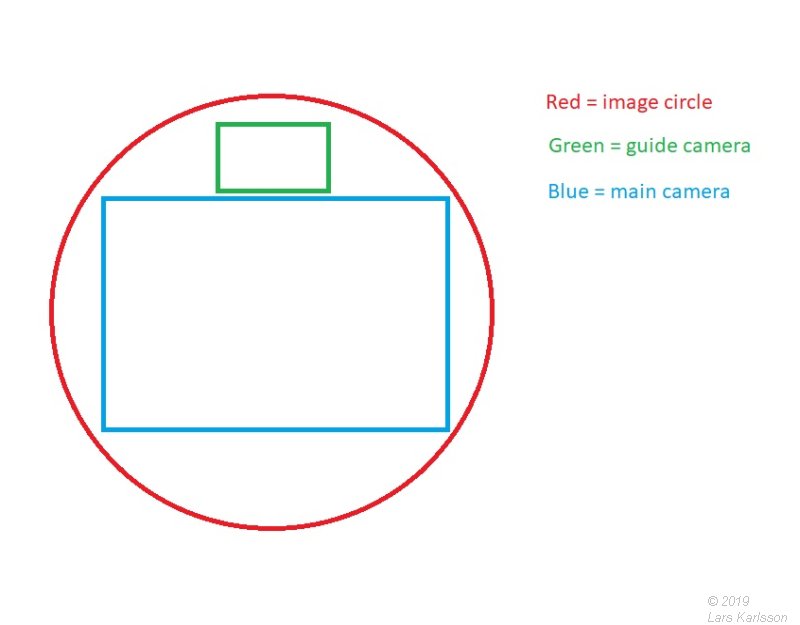
A schematic drawing how the main camera sensor and the guide camera sensor are oriented in an optical view. All optics has some vignetting and other drawbacks at the edges. That's why we want to have the guide camera as close as possible to the main camera sensor. But not that close that the prism block the light to the main camera sensor. This is how it looks if you looking into the off-axis adapter towards the main camera (and have the shutter open). The usable image circle of a field flatter can be difficult to find, but modern designed 2" x1 correctors normally handle an APS-C sensor (29 mm diagonally). If the corrector also is a reducer they normally has a much smaller image circle. Look at my collection of links with reviews. 
If you looking from the side with X-ray vision it looks something like this with the example of a Canon DSLR APS-C camera. As you see the prism pickup the light rays (red in drawing) that fall outside the sensor. The black line is the optical axis. What you have to do:
Comments:
1:
2:
3:
4:
5: 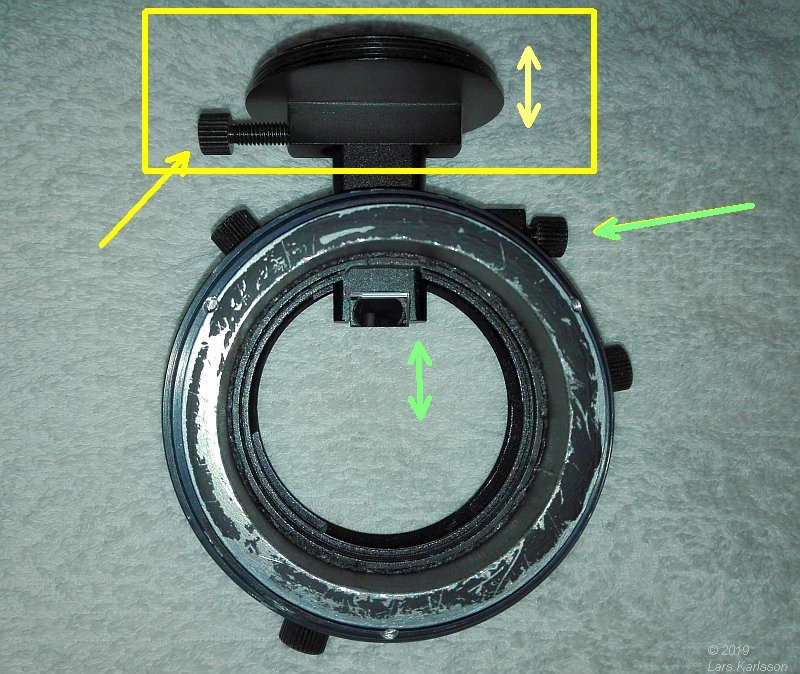
The upper yellow arrow point to the lock screw of focus for the guide camera. The lower green arrow point to the lock screw for the tube which is used to move the prism in and out. You maybe have to add some spacers between the guide camera and the off-axis adapter, the distance shall be the same as the center of prism distance to the main camera. The thread are normally the T2 standard.  Note: the "tube" sometimes can hit the sensor of the guide camera, be careful to not let this happens, it will destroy the guide camera ! It can be difficult to find the focus of the guide camera, stars could be weak, have at least 2 seconds exposures, set a high gain in the beginning. You can also use the main focus, note the focus scale position when you find the guide camera focus. Compare this value with the value where the main camera had its focus. It will give you a hint if you need to add some spacers between the guide camera and off-axis adapter.
Example; 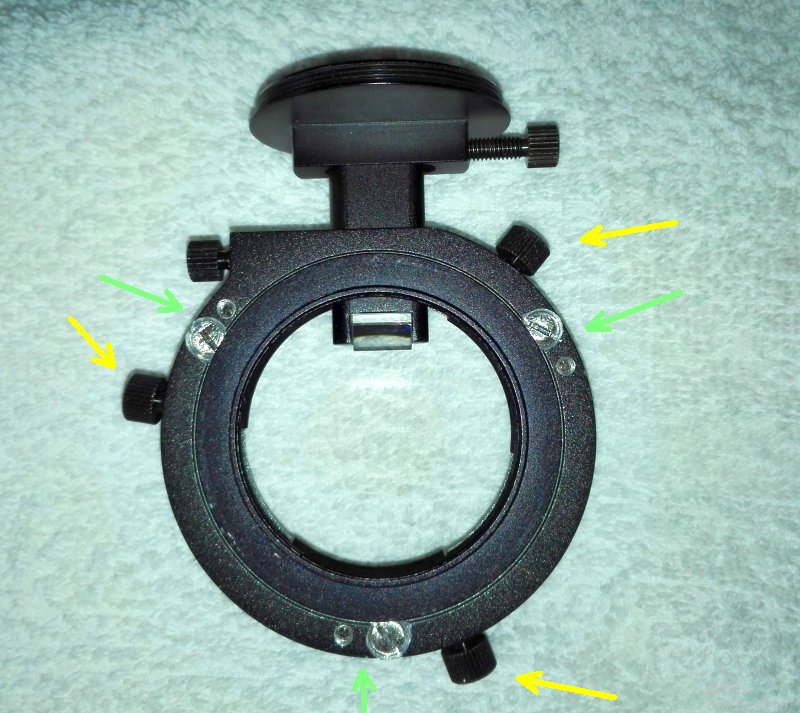
I have rebuilt my off-axis adapter, it can now handle full frame sensors better. I also built in a tilt adjusting, the green arrows. The yellow arrows point to the locking screws for rotation of the main camera position. To the main camera there is a M48 thread, on this I screw the Canon EOS adapter. On the telescope side originally it was a M48 thread, I have replaced it with a M68 thread to fit my 2.5" field flattener. See also my project: full frame off-axis project. or my project: medium format off-axis project. The END
|
| Go Back |