|
Advertisement / Annons: |
3D CAD:
|
Contents:
Note: |
12, CAD of 174 slicing and printing, part 7:It will be exiting to see how it appear in the slicer software Cura. Uploading the STL file to Cura: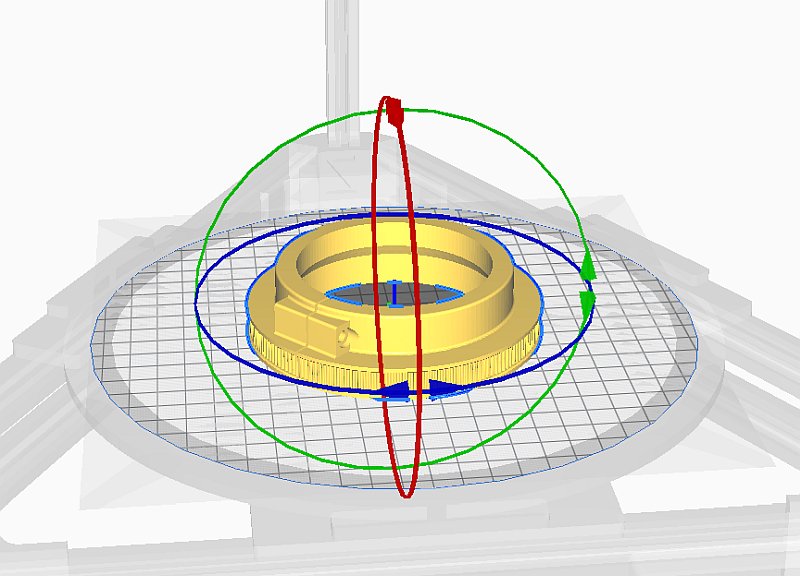
Now the center area is empty, no warnings either. I flip it upside down to this orientation and align it to the printer bed, this is done with the tools in the menu to the left. Setup the printer parameters in Cura:
I change some of the printer parameters from the standard values. Print with highest precision, 0.1 mm. Wall thickness increased to 2 mm, it's some load on this device. The other parameters are adjusted by automatic after this. 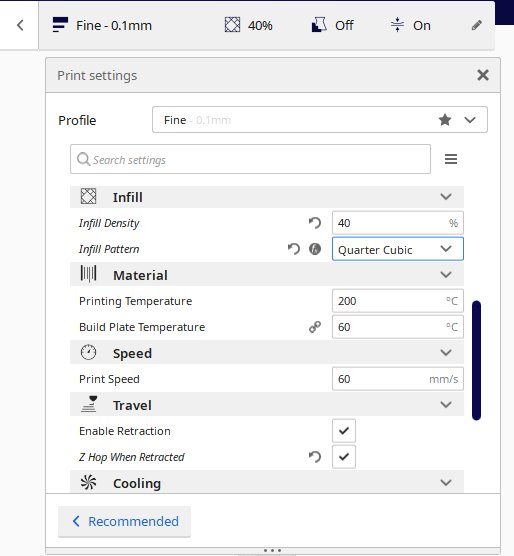
Increased the Infill to 40% and use the Quarter Cubic pattern. This is the pattern it fills the emptiness between the walls to increase the strength. 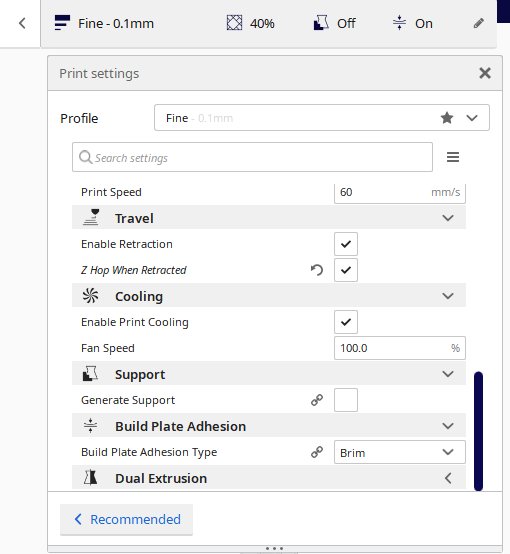
Added the Brim option to Build Plate Adhesion, that is the thin bottom layer it use to secure the object to the printer bed. After I had sliced the object it reported that it need 11 hours and 30 minutes to print it. I who expected it to decrease from 8.5 hours to no more than 5 hours. But if it print a perfect pulley for me it's worth waiting. Uploaded the sliced file to the SD card and put it in the 3D printer. Starting an eleven hours printing: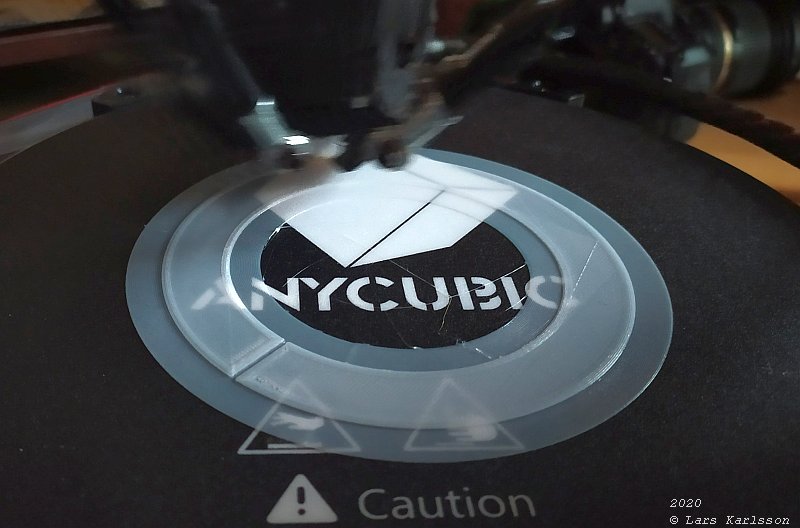
After 30 minutes of printing I can see that it print the pulley correct now. Meantime it's printing I wrote the two last pages of this project. 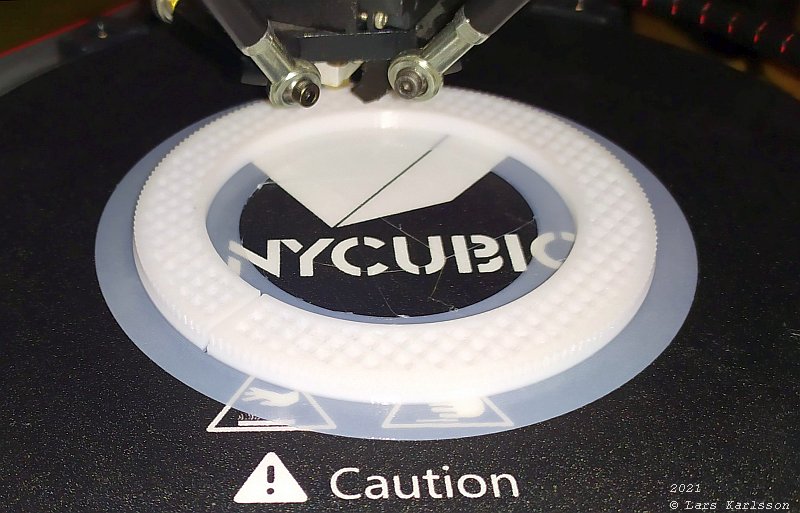
After three hours, halfway through the teeth. Now the fill pattern can be clearly seen. 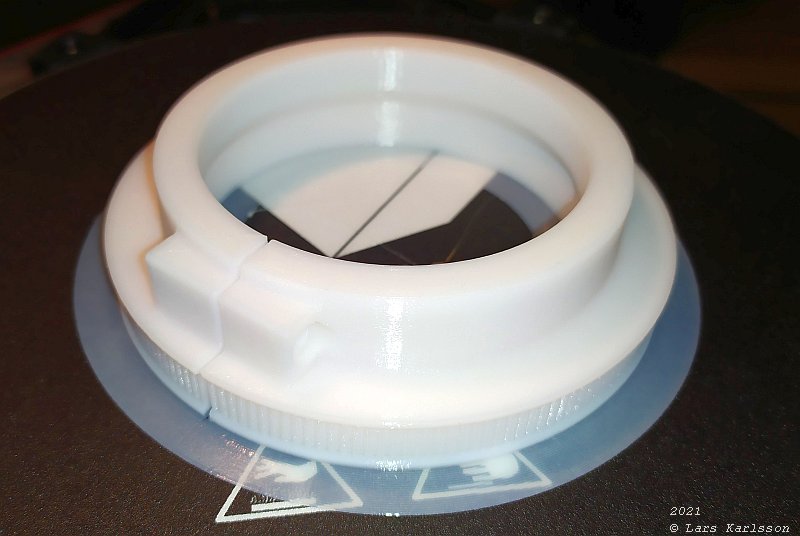
Late at night it was finished, looks awesome. 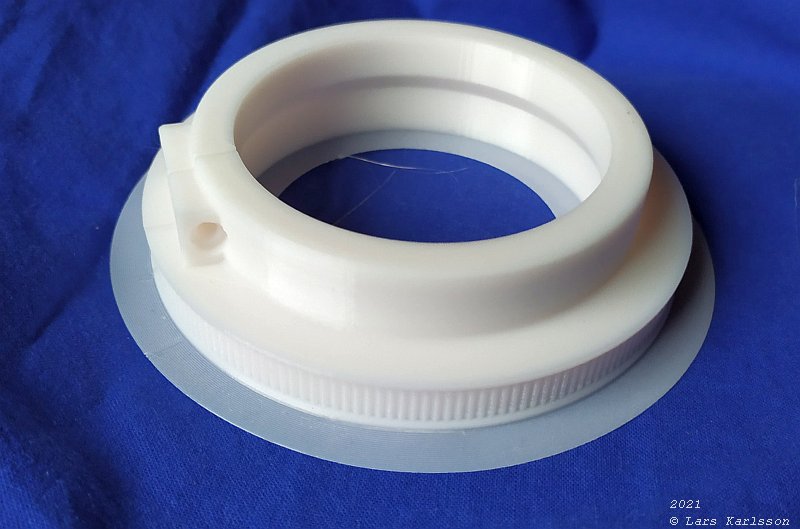
Pull it away from the printer bed and inspect it. 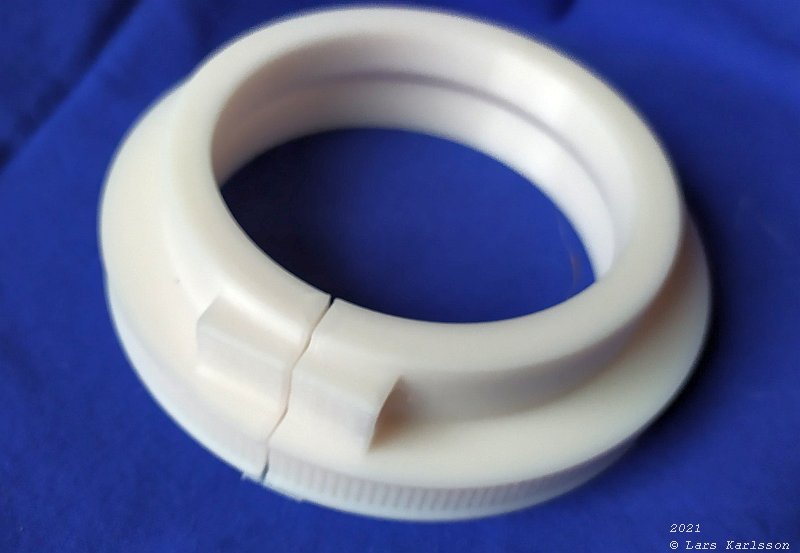
Remove the base brim, very easy to remove. 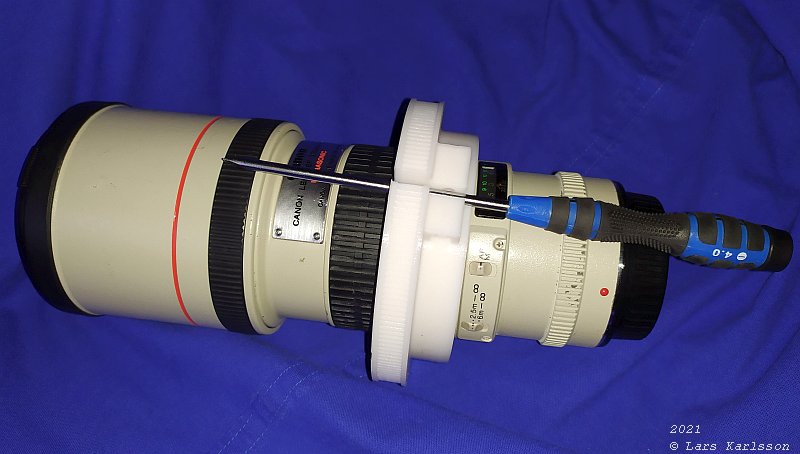
Do a first test if it will fit around the lens barrel. Put in a screw driver to open the slits, otherwise the lens' button can be damaged. 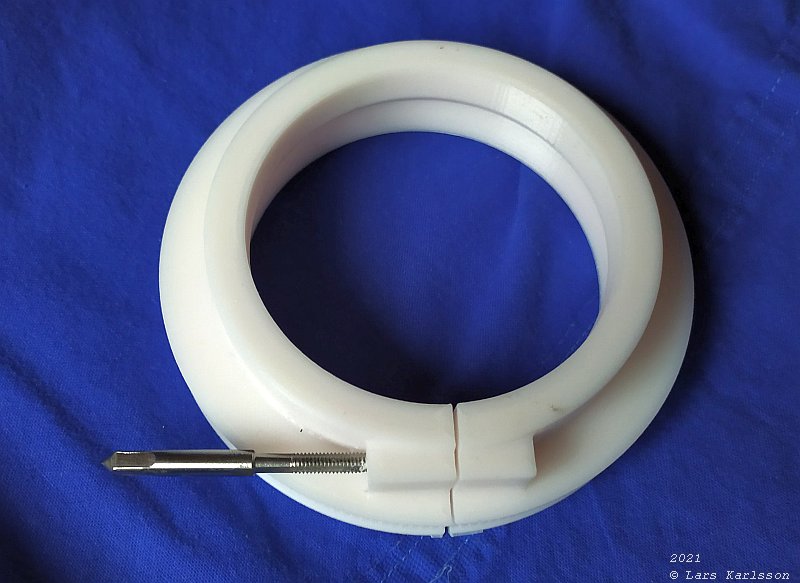
Making the threads, M4. The hole was a bit to small so I drilled it up to 3.2 mm. 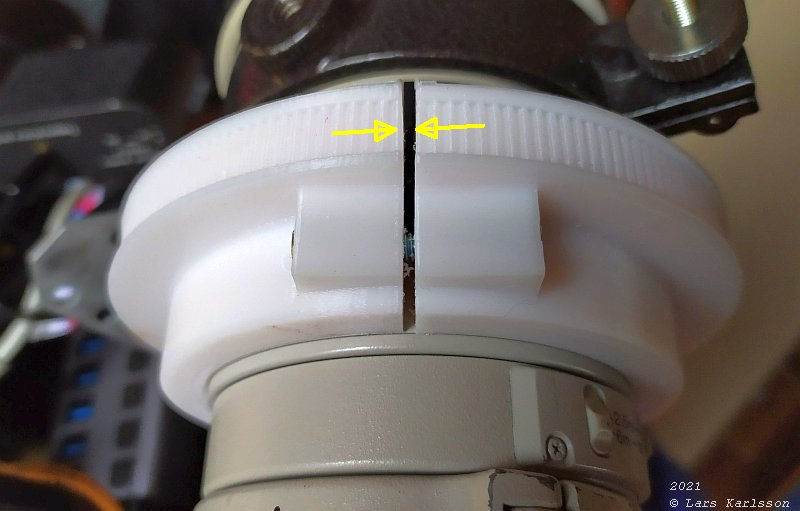
Tighten the lock screw, the slits close to 1.3 mm. It was set to 1.0 mm, maybe I can grind the big hole of the pulley if I want it exact. But I will place the slit in that position that it never come in contact with the timing belt. 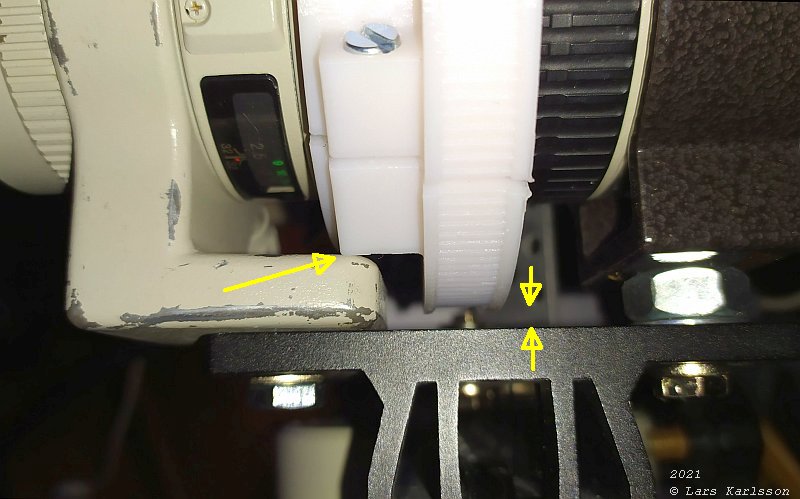
There is some room left to increase the pulley, 4 mm. That make the diameter 8 mm bigger and the circumference 24 mm longer. The timing belt has a pitch of 2 mm, I can increase the number of teeth from 174 to 186.
Note: 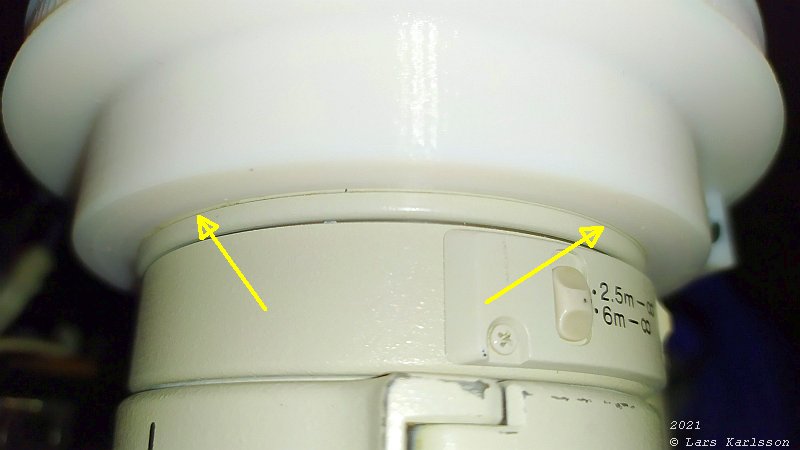
I mount the pulley in position of this line. 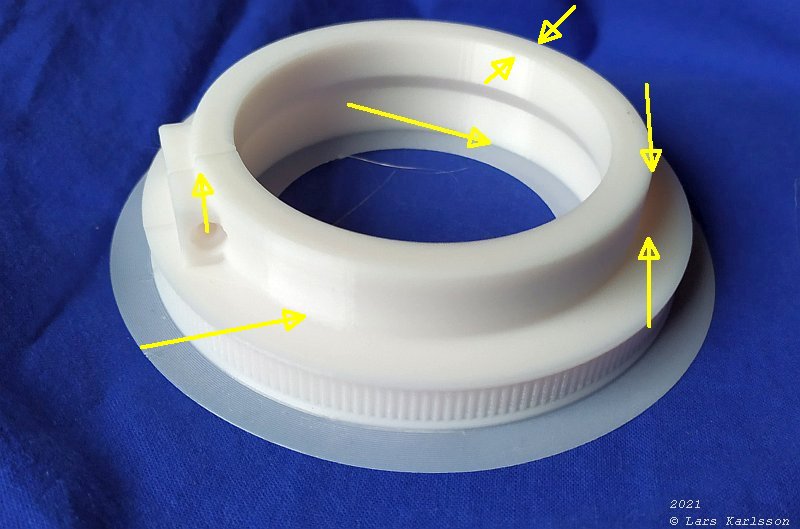
I will put up this pulley as a *.STL file on my homepage later. But first I will do some modifications: move the screw 2 mm upwards, reduce the height with 2 mm, reduce the height of the hub with 1 mm, put a 5 mm radius on the inner hole. I will also add a text with information. I will introduce this changes first on the pulley to my Pentax 645 ED 300 mm lens. |
|
|