|
Advertisement / Annons: |
3D CAD:
|
Contents:
Note: |
15, CAD of 180 teeth pulley, part 1:I wasn't fully satisfied with my first design of the 174 teeth pulley. First of all I need it to be as big as possible, otherwise the small pulley will have very few teeth, less than 16 teeth isn't good. I also want it to be more compact and stiff. I save material and it make it faster to print. 180 teeth pulley, latest design: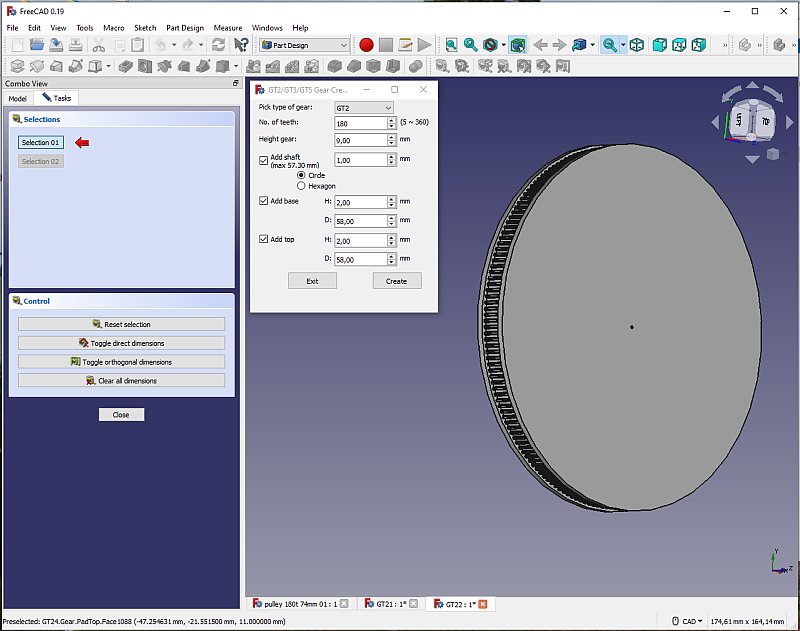
Now I can draw and design a pulley much faster compare to when I started my struggling with the CAD program and it will also be a much better design. I start once again with the macro that creates the pulley, setup a more basic design and add the special hub later as a separate device. 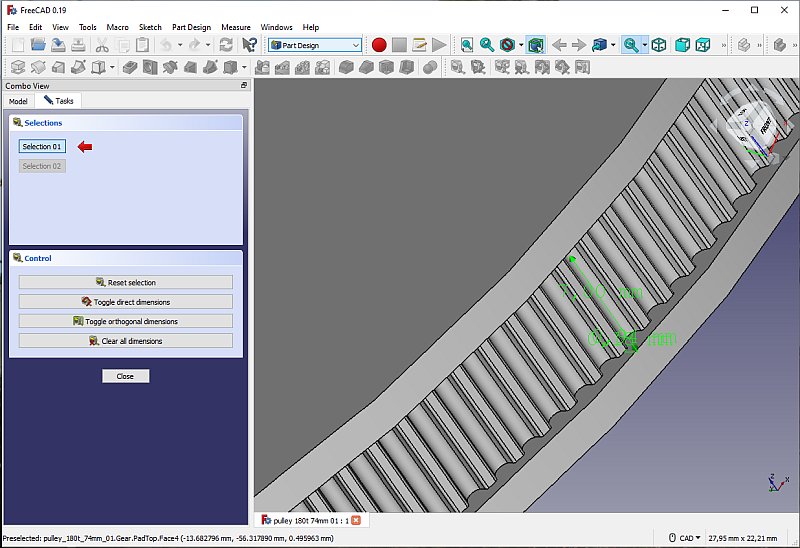
I plan to use a 6 mm wide timing belt. The first pulleys I designed I set the width to 6.5 mm, later to 8 mm and now I reduced it to 7 mm, I think this could be optimal when using plastic material to the pulleys. The flanges are 2 mm wide. Make the hole for the lens barrel:
I started with a pit, but later I found it was much easier if I had the hole all the way through. I set this hole to 85 mm diameter, the lens barrel is 74 mm. 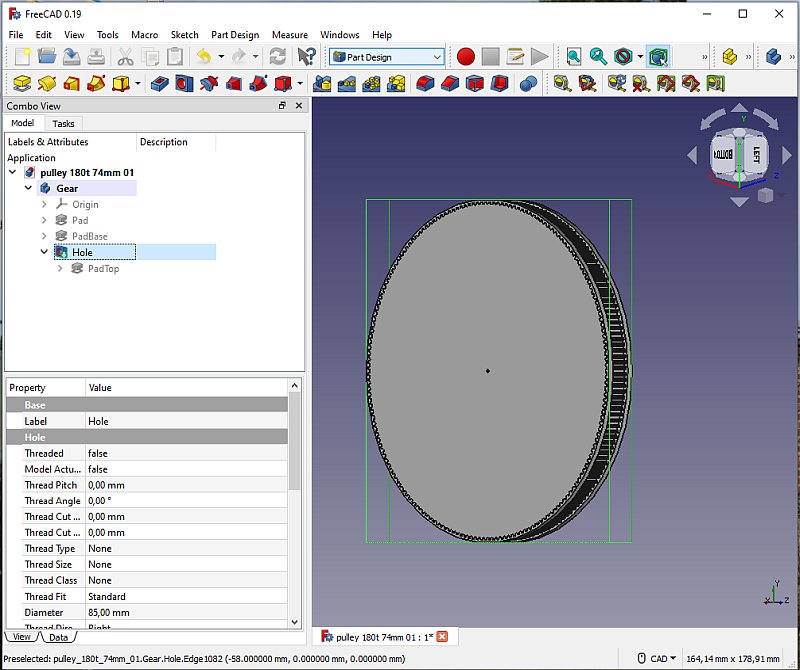
On this side I will add the hub that connect to the camera lens focus barrel which is 74 mm in diameter. 
When doing this hub I use the Sketch tool, a 2 D drawing that I wrap around the Z-axis. The 2D drawing is oriented in the YZ-plane. 2D sketch: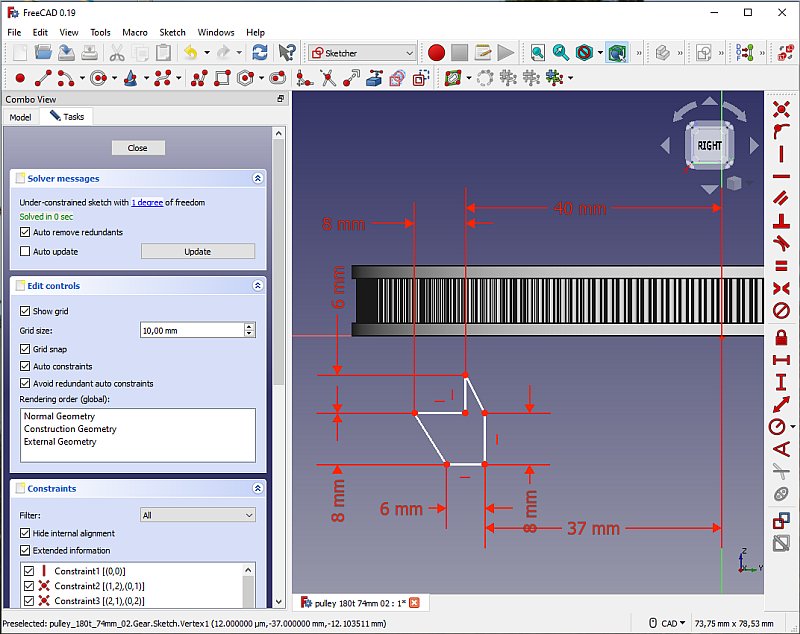
My first pulley I needed to have support to, because you can't print in the air, must be made from bottom and up. If all angles are steep enough it's no need for support, the limit is around 60 degree. 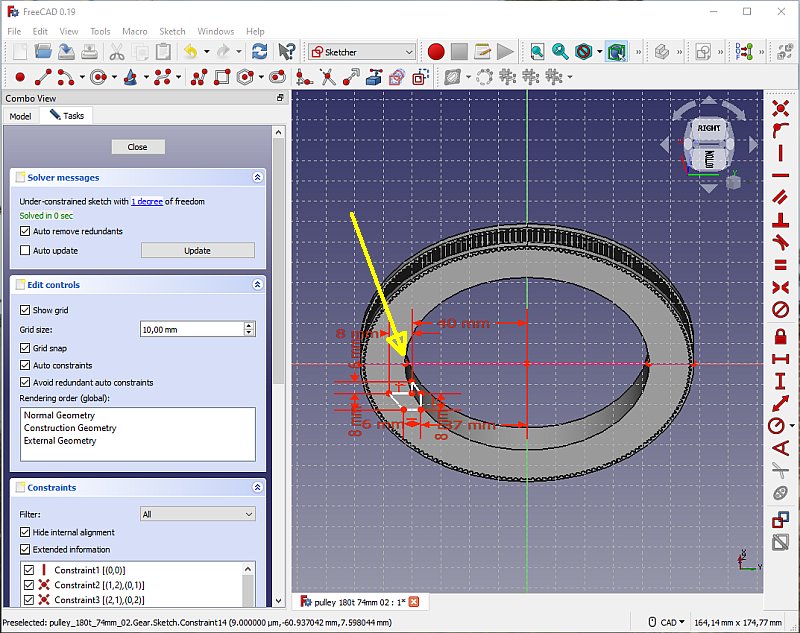
I have now gone back a few step and made the hole all through the pulley, I found it much easier to have it like this. This 2D drawing will later be attached to the pulley. The reference point to the pulley is where the arrow point. It must be a connection between the 3D model and the 2D drawing. 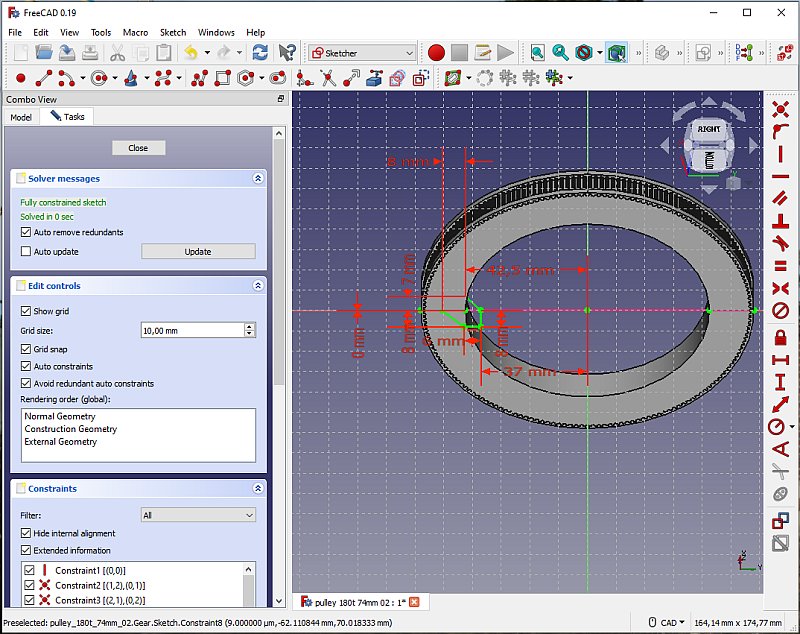
Set the 2D drawing in contact with the pulley, line to face. 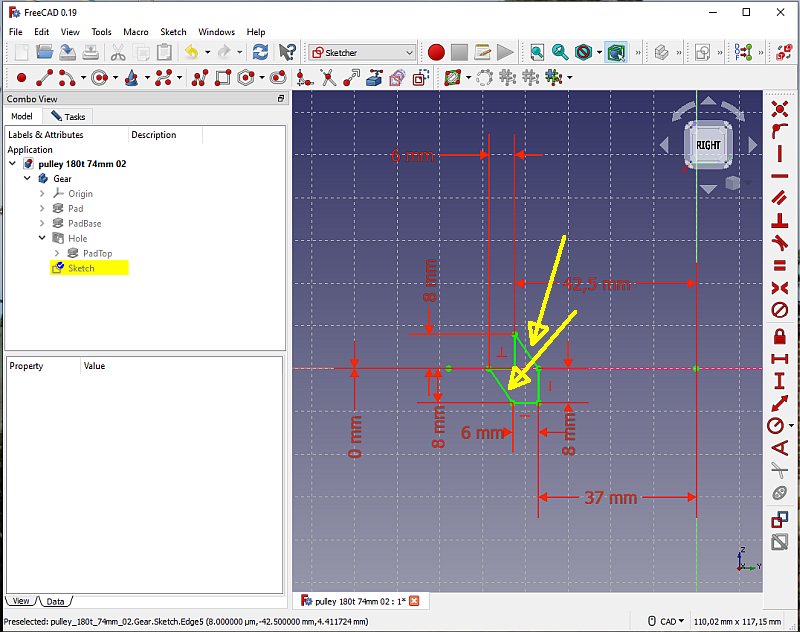
Do some adjustment of the dimensions to have the parts at a steeper angle and make it easier to print. I must also carefully check that the offset between the hub and timing pulley is enough. |
|
|