|
Advertisement / Annons: |
Tutorial:
|
Content:
Note: |
2.2, Correct for really bad vignetting:I have some old images with incorrect flat frames and also old films that are scanned which I don't have any flat frames for at all. Now I want to take a new look at my old comet photos if I can get them better. I calibrate them in Siril when I have a flat frame even if they are of low quality. Earlier I used AstroImageJ with a special tool to make synthetic flat frames when I missing flat frames. But even with a 8th degree polynomial it wasn't easy to correct when the shape of the flat frame was odd. In a new attempt I have studied how I can use Gimp to flat frame correct badly flatted images. Test object comet Andromeda galaxy and comet Panstarrs C/2011 L4: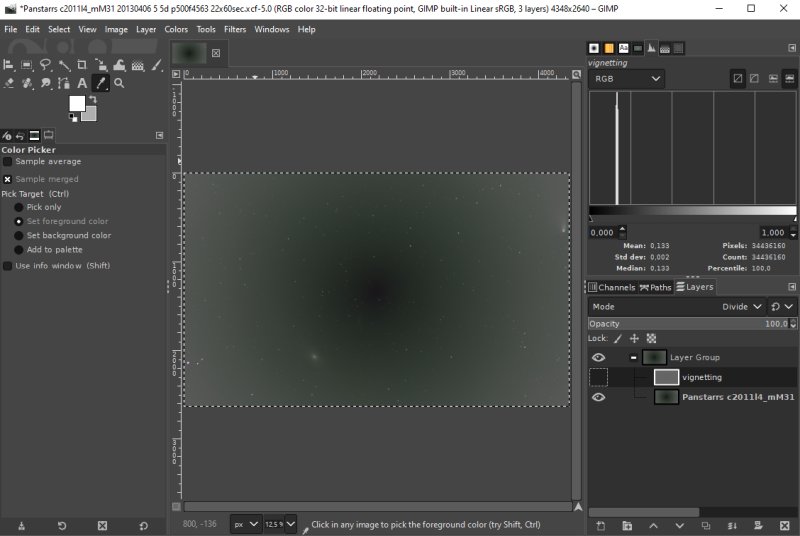
These old photos was taken with a Pentax 500 mm f/4.5 lens. I have flat frames for f/4.5 but not f/5.6 which some of the images was taken at. The result is that the flat frame calibration I did in Siril over compensate the vignetting. Still I do this flat calibration because it correct for the pixel to pixel variation a bit. When that is done I correct the over compensated vignetting in Gimp. Here the image is level and gamma corrected to get the over compensation clearly seen. It's a visually compensation I do so it's important to get a good view how bad it is. Create a gradient (vingetting) layer:
First I need a new gradient layer which I have called vignetting. Use the foreground color and set it to divide the previous image. The same as you do when doing a normal flat calibration. I place it in the same group as the original image. Setup Gradient tool: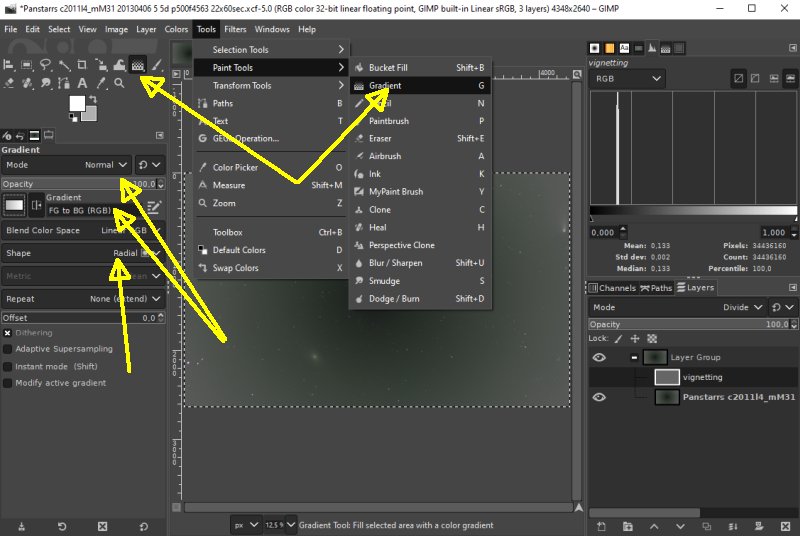
Choose the Gradient tool from the menu or direct from the tool list. Activate gradient correction: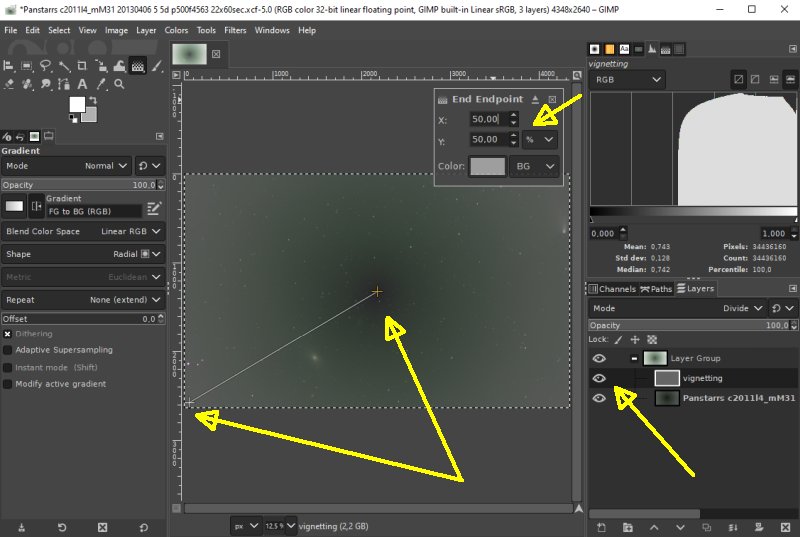
Find the optical center of the image first, you can set the tool to show the percent which make it easy to find. But in reality the optical center isn't exactly in the center of the image. The vignetting layer must be activated (visible). Set foreground color:
This image has the vignetting in opposite shape, set it to reverse. With the gradient tool, draw a line from the optical center to one of the corners. As you see I have moved the optical center a bit out from the image center. Click on the Color button in the End Point window and the color setting window popup. I start with a B/W layer, set the C control to 0. Adjust the vignetting with the Luminance, lower value get it brighter. I have set the scale to 0-100, but the 0-255 work as well. With a normal vignetting when the center (Foreground) is the brightest I set the luminance to 90. Next, mark the other end of the gradient line in the corner. Click on the Color button and get the color tool once again. For a normal vignetting the corner (Background) Luminance is set from 50 to 80. Add an extra control stop point: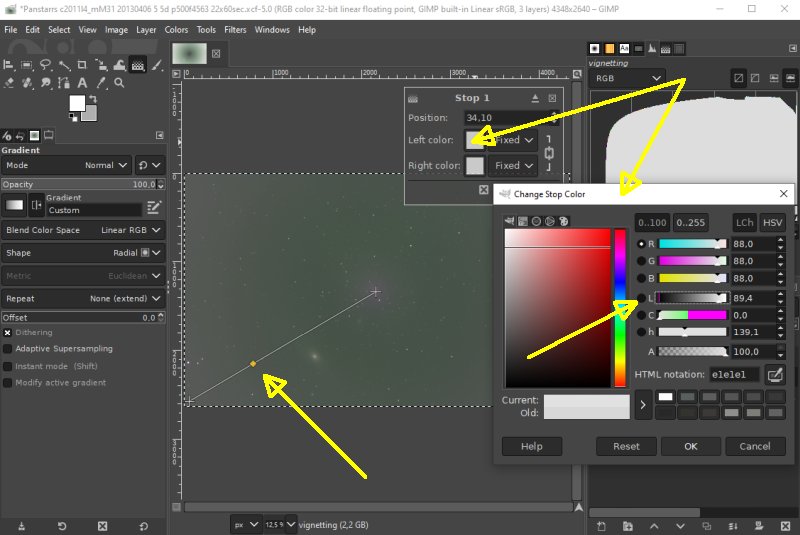
Now what makes the Gimp really shine. I can add extra control points when I have complicated vignetting patterns as in this case. Click on the line to get an extra correction point (Stop 1). Click on the Left color button in Stop 1 window and correct the Luminance level, too heavy or low and you get a circular pattern. Correct the small spot in center with one more control point: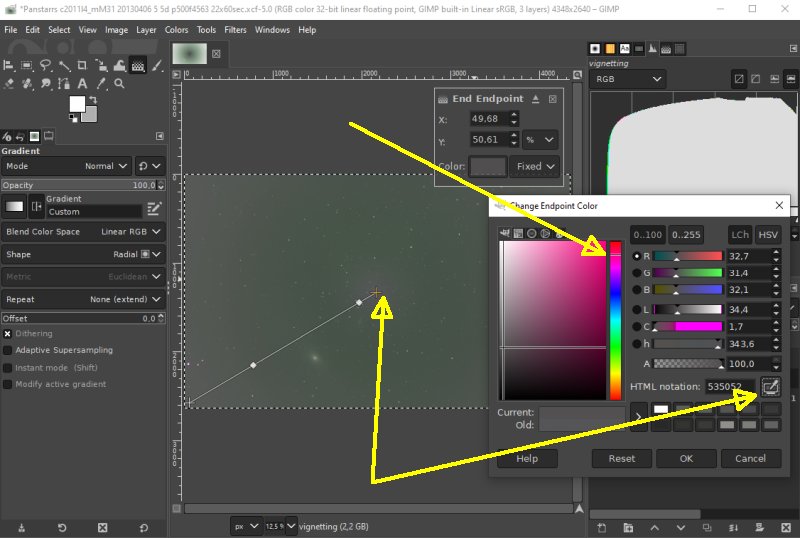
In the center is a complicated peak to correct, add one more stop point. In this case it has a diverging color too. I use the pick color tool at the center, after I can use the vertical color bar to fine adjust the color. This technique with extra data points works for linear (1-dimension) and bilinear (2-dimension) too, very useful. I have used this on my scanned film photos of comet Hale Bopp. It's much better now but still a lot of other problems, the noise: Hale Bopp (the second image). Much more can be done to these images a rainy day. Still I always do a flat calibration of my images when I have flat frames. Then I fine adjust the image with Gimp's Gradient tool.
|
|