|
Advertisement / Annons: |
Project:
|
Contents:
Note: |
1: IntroductionSince two years I have used a Linux based control system for my astro equipment. In the Windows world it's ASCOM you find most of the drivers in, in Linux it's INDI drivers. Now I have problem with the INDI EQMOD driver that control SkyWatcher's telescopes. It's an old driver and I have to fix one or two problems with it. Normally there are a lot of skilled people that updating the drivers, but it's old and no one seems to work with it. Only me left to do it. It's written in C++. It was 27 years ago I did something with C++, so it's a big step for me, but now I must solve it. But I have a friend who knows everything about developing software and setting up the environment to do this, without his help this had been almost impossible for me. Some history about SkyWatcher and EQMOD (Windows): Installation of Qt Creator:
When developing these INDI drivers for Raspberry all say to me: On the INDI homepage there are instructions how to setup the development tool Qt Creator. Just to follow it, or ? Hm ... maybe. But it's very handy to have a friend that guide you through, at least for me. I gave this command in the commando window to install Qt Creator:
You have to enter your pass word, if it's the standard it is: astroberry. After successful installation this should have been added to your Raspberry: 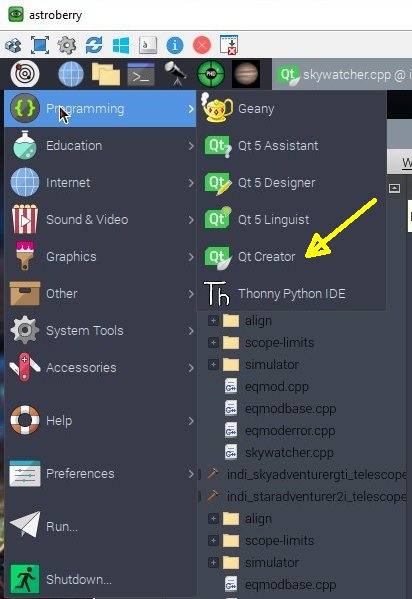
Qt Creator is the tool where you develop your C++ code for your INDI driver. GitHub:The project is connected to GitHub where my friend helped me to create an account for my INDI drivers project. From this you get access to all the drivers and there source code. Maybe you can have the files installed on your Raspberry locally and not need this GitHub connection, but it's handy and you can share it with others. |
Open a INDI project: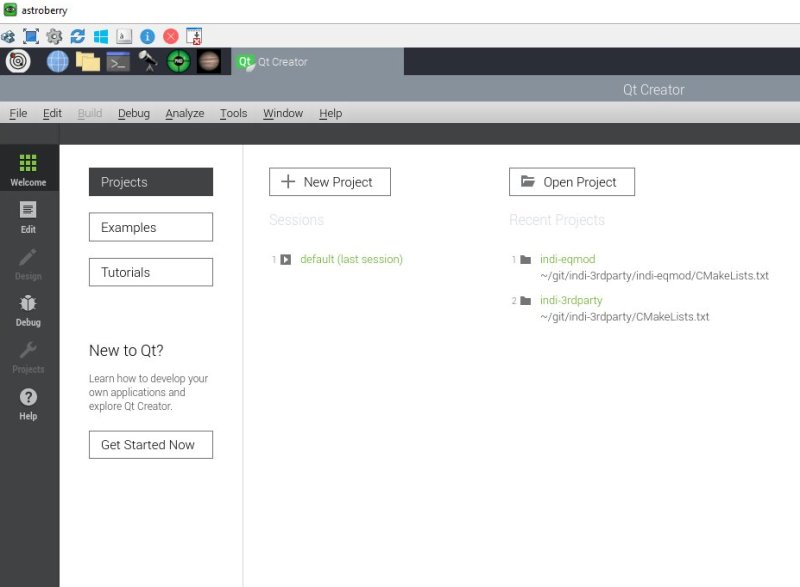
Use the button "Open Project" to open your project. In this case it's my special version of EQMOD I want to develop. 
Next is to open the project file. It depends on where you have installed your INDI files. In my case I find them under the Astroberry map and Git. From there open the indi-eqmod map. The project file is the CMakeLists.txt file, open it. It's a standard name. 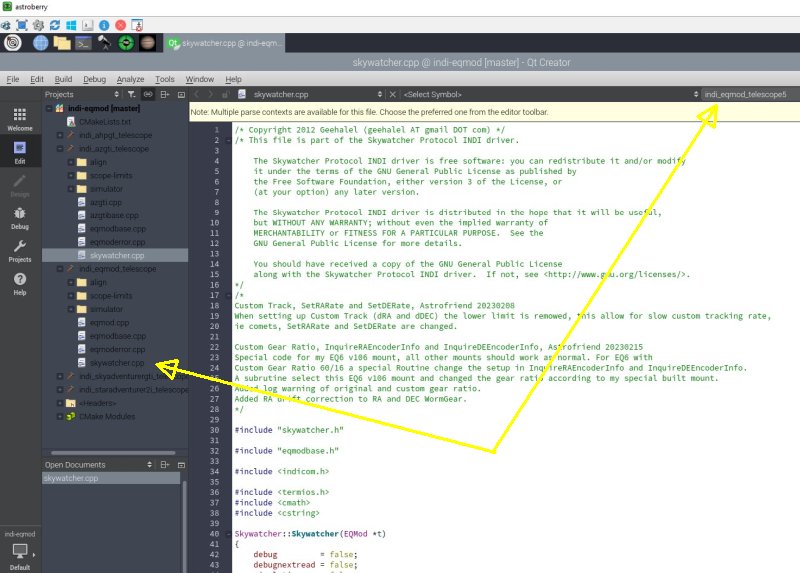
In the list on the left side. Look for the library you want to work with. In my case the indi_eqmod.telescope. The file I want to edit is the skywatcher.cpp. Note, you find this file in several places, open at correct place. Upper right, also change this to correct indi_eqmod_telescope. This file is now ready to be edited. By examine it carefully I understood how the code is constructed and I was able to implement my version of how I want EQMOD to work. Very difficult because it's a big file and when you don't are so skilled at C++ it take some time. |
Compiling:
When doing the first test compiling it went wrong because it didn't find some files in the ahpgtbase.h file. These where the files that had to be included. All with help from my friend, even he felt some frustration over this. 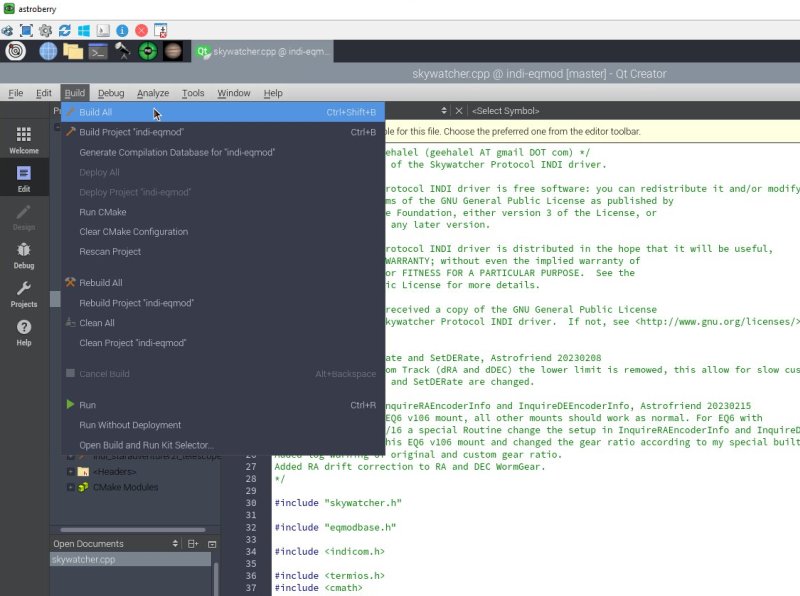
To compile, use 'Build All' from drop down menu. First time it will take a long time to compile it, next time it do it much faster. 
The compiling went correct without any errors. The new compiled file can be moved and replace the old original one, but my friend made it more advanced. He set it up to look for the new file where it is instead of using the old file in its original place. Now the system is ready to do some C++ coding in the INDI drivers. |
Find the EQMOD source file:If you wonder where your files is stored locally on your Raspberry. It depends a bit how you installed it, in my case I found them in the map /home/astroberry/git/. 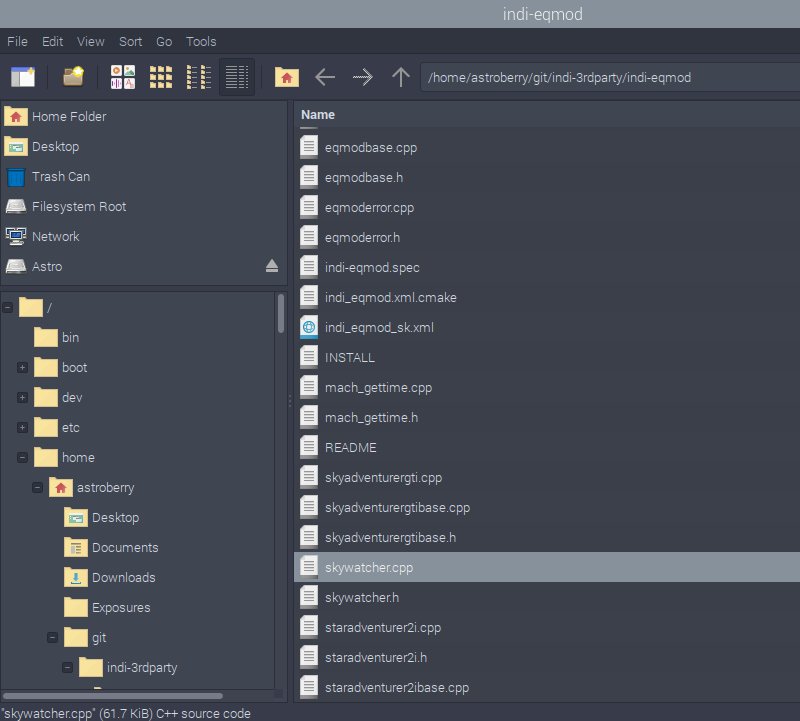
Look in the map: /home/astroberry/git/indi-3rdparty/. Scroll down in the left column. 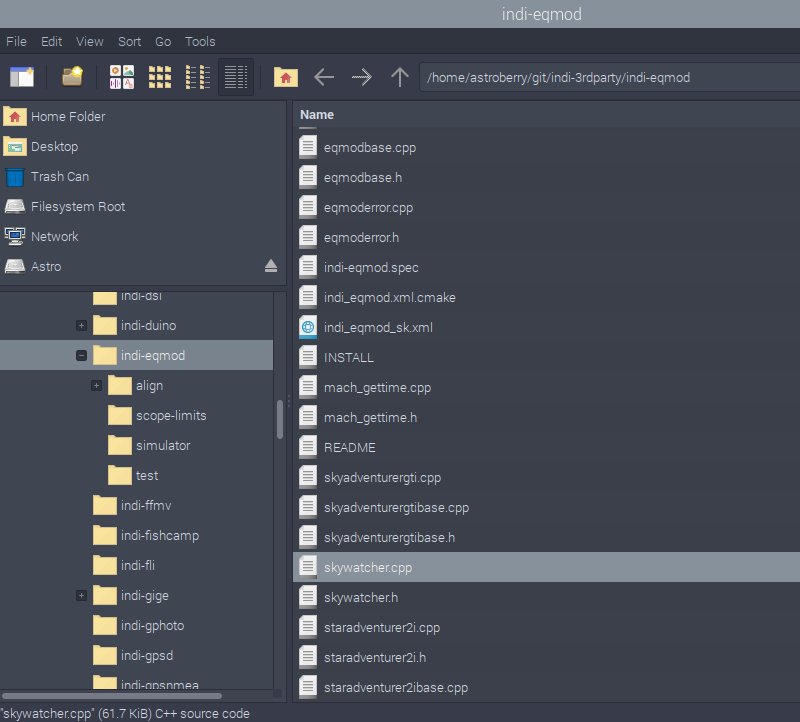
Scroll down until you find the map indi-eqmod. Open the map and scroll through the files to the right until you find the file skywatcher.cpp . This is the source file, skywatcher.cpp and it contains all my changes. Find the EQMOD compiled file: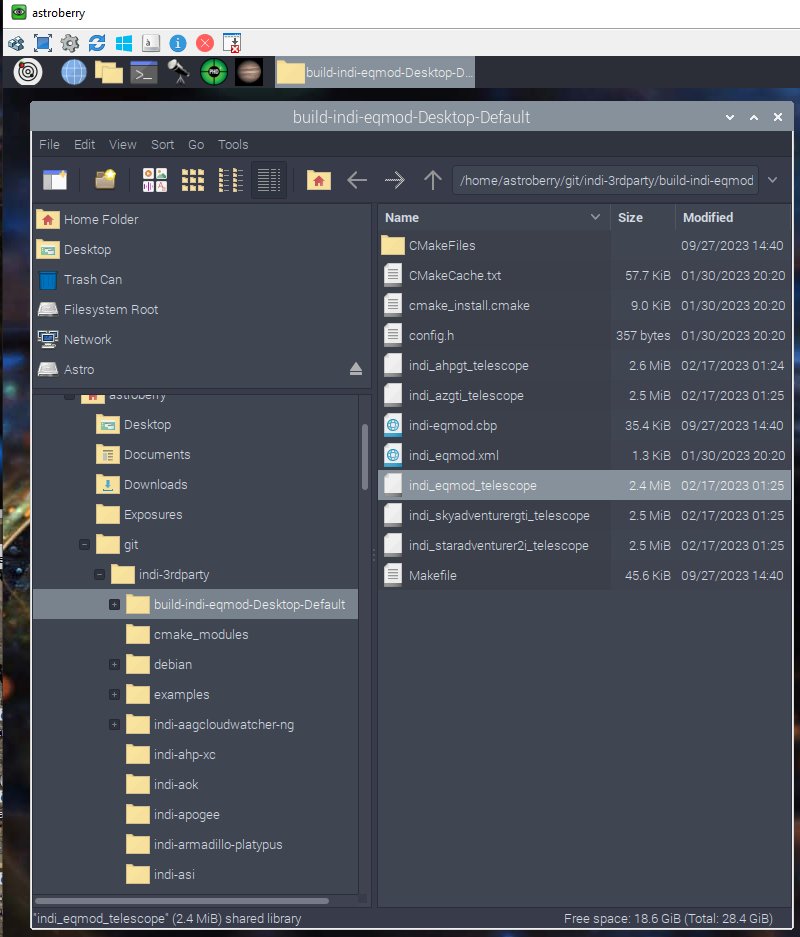
At "/home/astroberry/git/indi-3rdparty/buil-indi-eqmod-Desktop-Default" you find the compiled file indi_eqmod_telescope. This file must be copy and past in the map where the KStars/Ekos has its working files. See below. Find the EQMOD working files: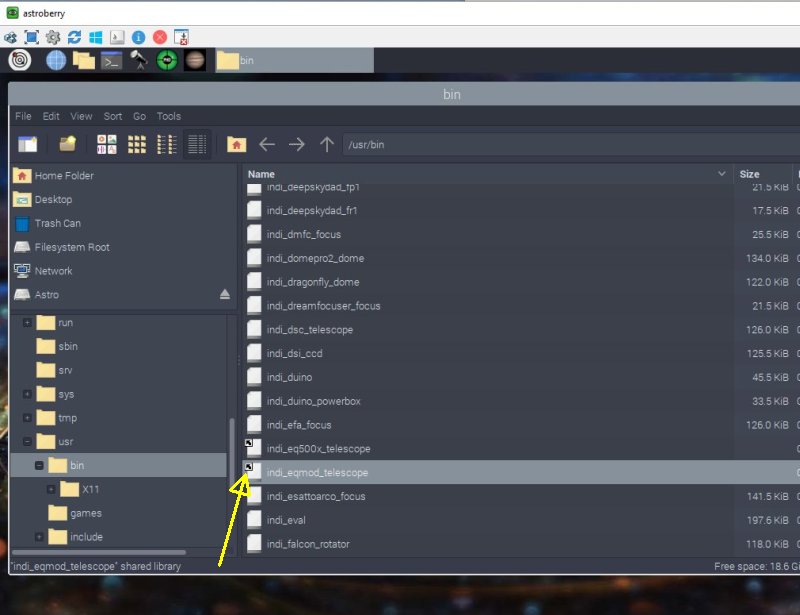
From the root /usr/bin you find all the files that make KStars and Ekos to run. It's many files and will take a moment until they show up. Scroll down until you find the file indi_eqmod_telescope. This is the file that must be replaced by the new compiled special version. In my case a special solution, note the little arrow on the icon. It points to the new compiled file without that I have to move it here. 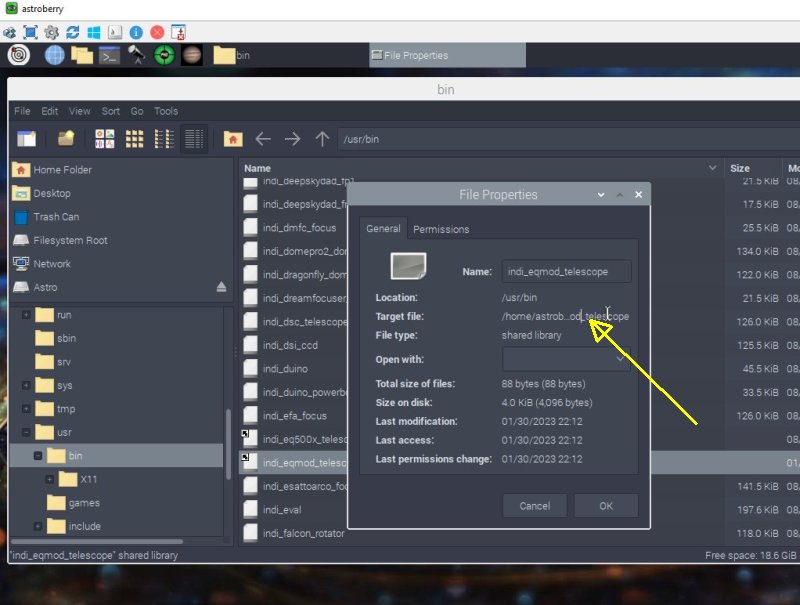
Right click on the file and open file properties. Notice Target File, hover over the text and you will see the complete file address to where the new compiled file is stored. |
Backup of files: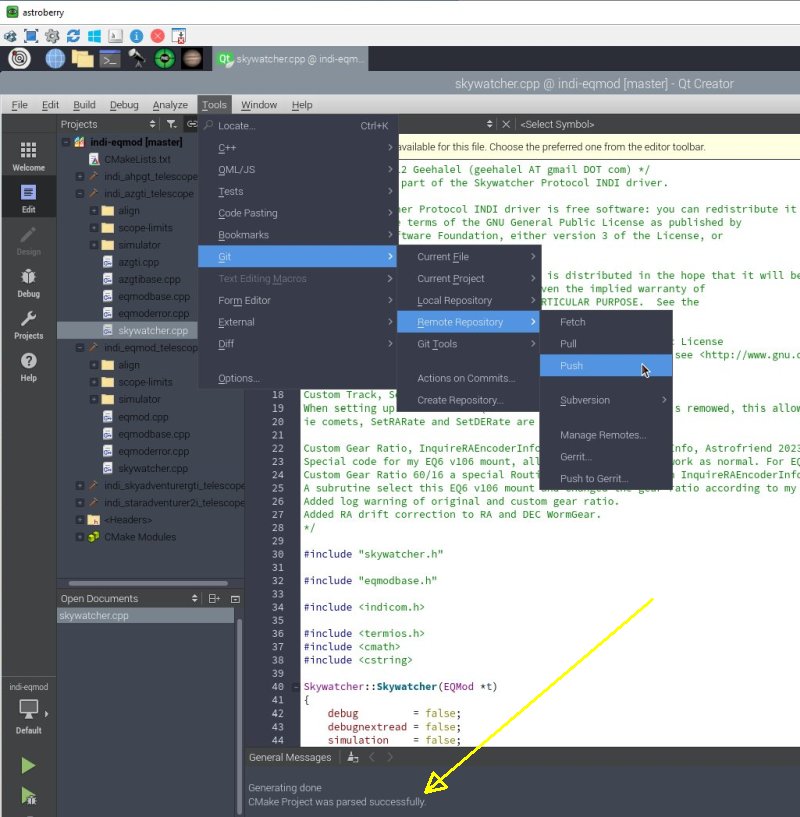
Make a backup of these files, either direct and / or if you are registered user on git-hub, do a git push. Check at bottom that it succeed.
|
|