Astrofriend's homepage

www.astrofriend.eu
../3dprinting.html
Share: Twitter Reddit Facebook Gmail Gmail Email
Search Astrofriend's homepage:

Valid CSS!

All pages shall now have been validated

Info Cookies (Kakor) / GDPR

Navigation

Advertisement /
Annons:

Twitter @AstrofriendLars

Follow Astrofriend

Tutorial News

Advertisement /
Annons:

Advertisement / Annons:

3D Printing:
My first 3D printer, assembling and setup


Contents:

  1. Introduction, unpacking and assembling sliders
  2. Installing the pillars on the bottom frame
  3. Installing the top limit switches and the top frame
  4. Installing the timing belts
  5. Installing the display and the filament feeder motor
  6. Installing electric devices and cables
  7. Adjusting the print bed
  8. Test print and test of Z-axis offset
  9. Installing CP2102 drivers and Cura
  10. Upload new 3D printer software - Marlin
  11. Mechanical calibration
  12. Setup Marlin 1.1.19
  13. Setup/Calibrate Marlin 2.0.0
  14. Tweaks
  15. Temperature P.I.D. optimizing
  16. Calibrate horizontal expansion
  17. Wind shield
  18. Replacing the nozzle heater
  19. To be continued

Note:
I take no responsibility or liability for what are written here, you use the information at your own risk!


18, Replacing the nozzle heater:

I have had this problem with the unstable nozzle temperature for a while now. After some serious measurement I found that it must be the nozzle heater that is something bad with. When it's hot for a longer time it looks as there is a broken wire, when cooling down it works as normal again. I ordered a new one.


New nozzle heater:

3D printer, assembling and setup

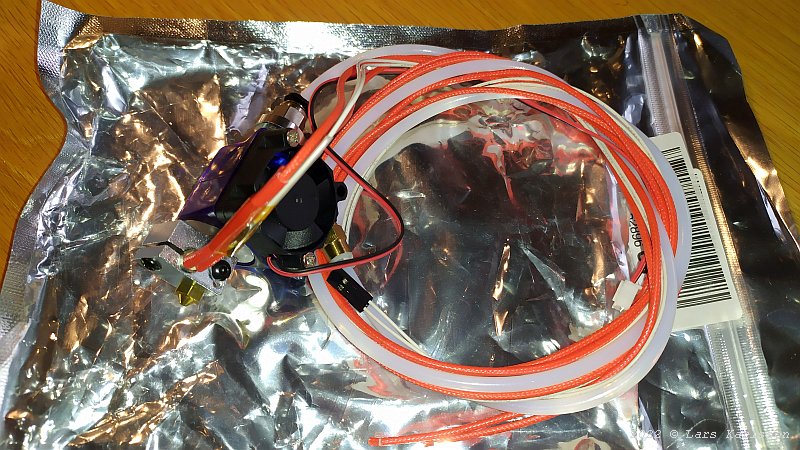
There where many of them to choose from, it's a 12 Volt 40 Watt heater. I got this kit for the same price as an alone heater. But it's not exactly the same.


3D printer, assembling and setup

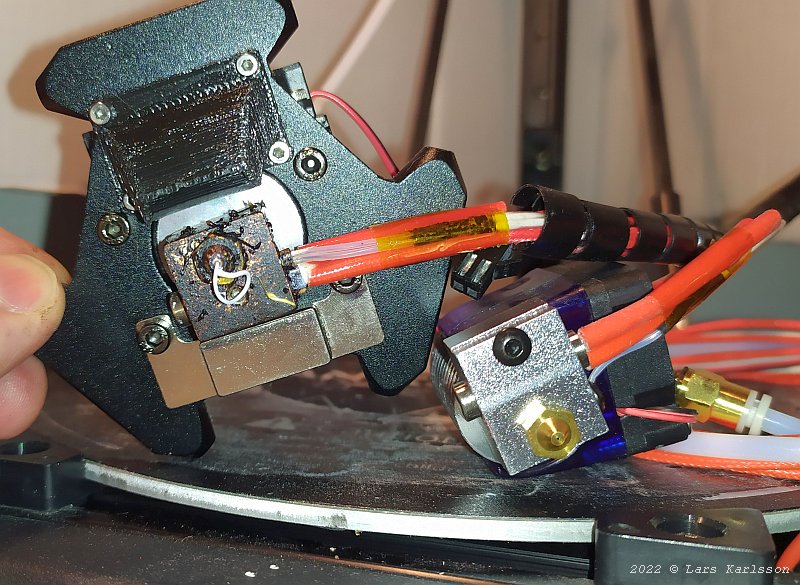
When comparing the old and new heater I see there is a different size of the block that hold the heater element.


3D printer, assembling and setup

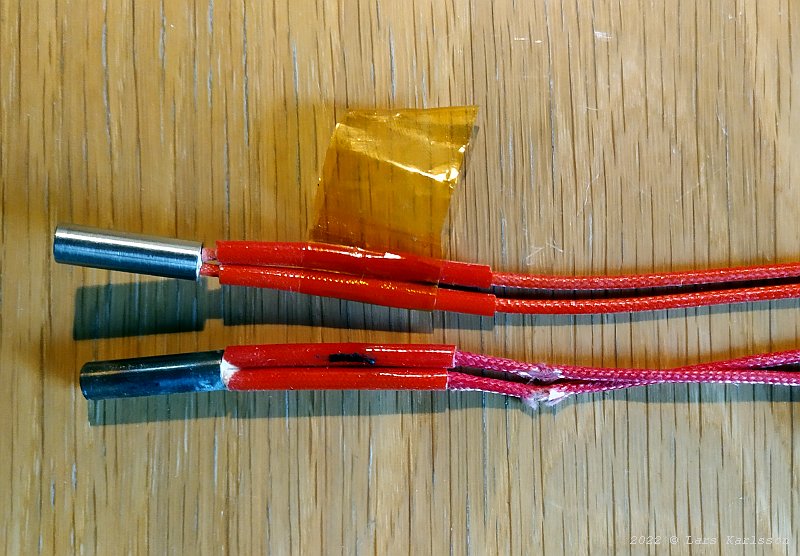
The heater element looks to be exactly the same. Look at the wire of the old, the one below. They looks to have some damage, maybe what has causing the problems.


3D printer, assembling and setup

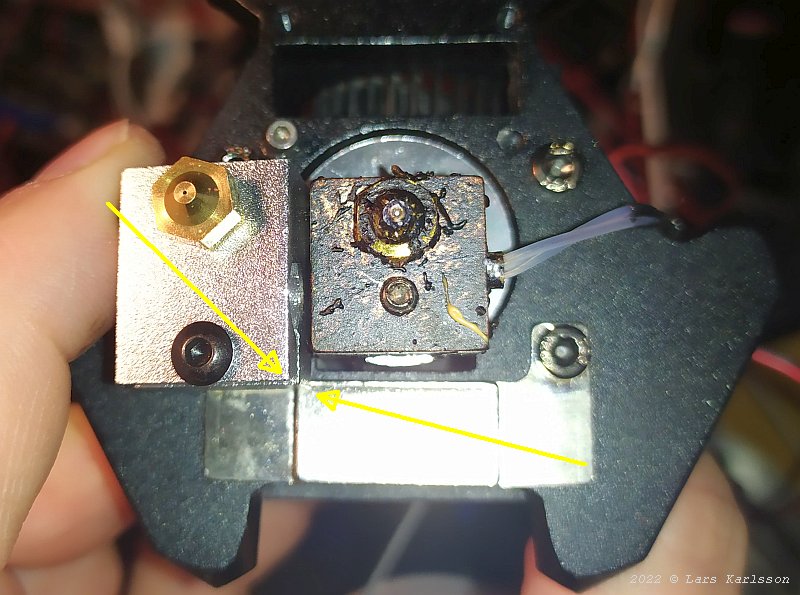
The new block protrude to far and hit the metal bracket that holds the auto bed leveling sensor. I can't use this block.


3D printer, assembling and setup

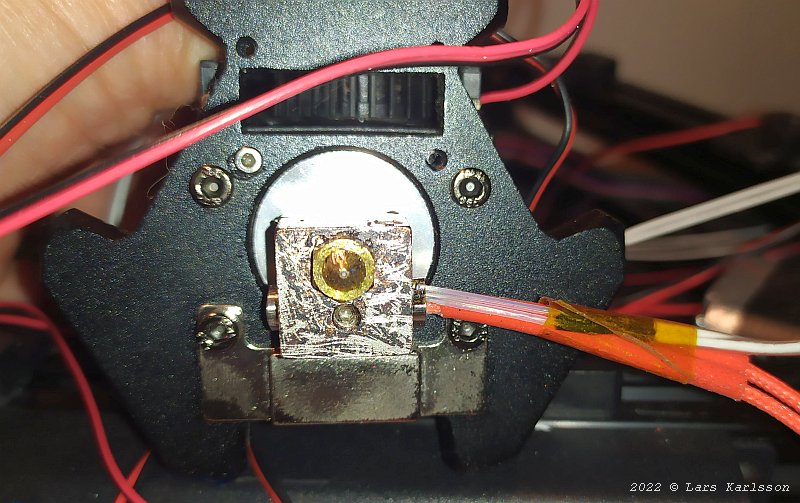
At the end I only used the heater element from the new nozzle heater I bought. The other parts will be spare parts for something else.


3D printer, assembling and setup

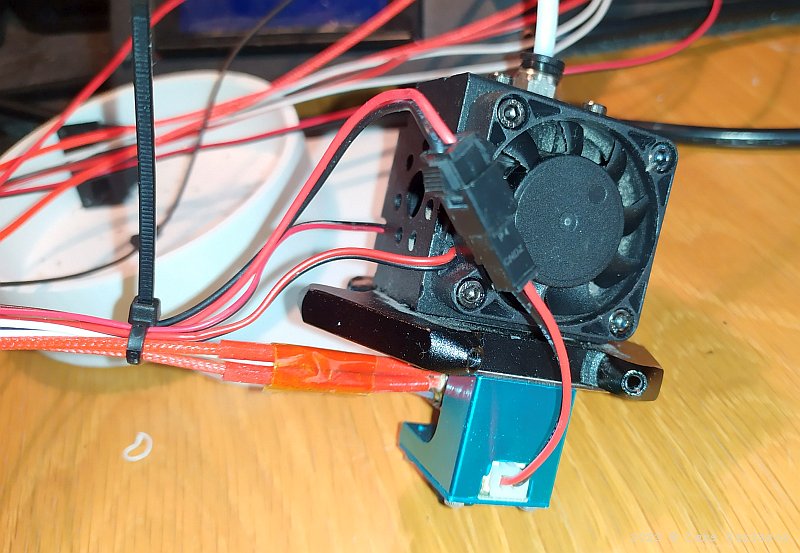
Bunt together the wires and adjust the length of them, the blue box is the auto bed leveling sensor. Only in place when doing calibration of the print head against the bed.


3D printer, assembling and setup

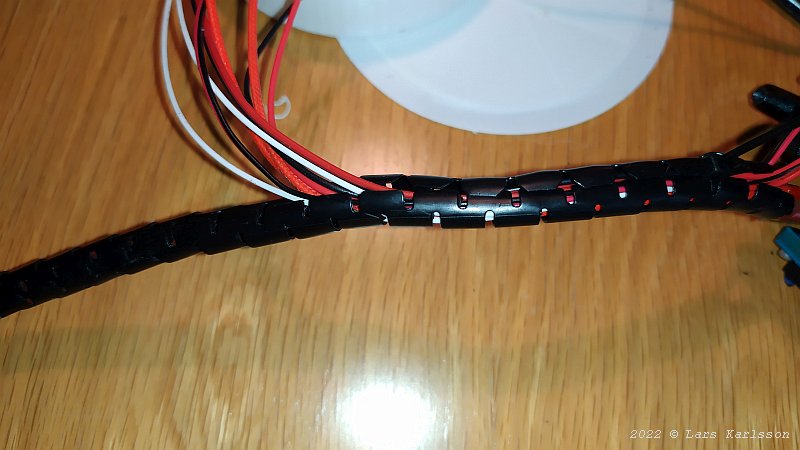
Install the protection plastic tube again, very time consuming.


3D printer, assembling and setup

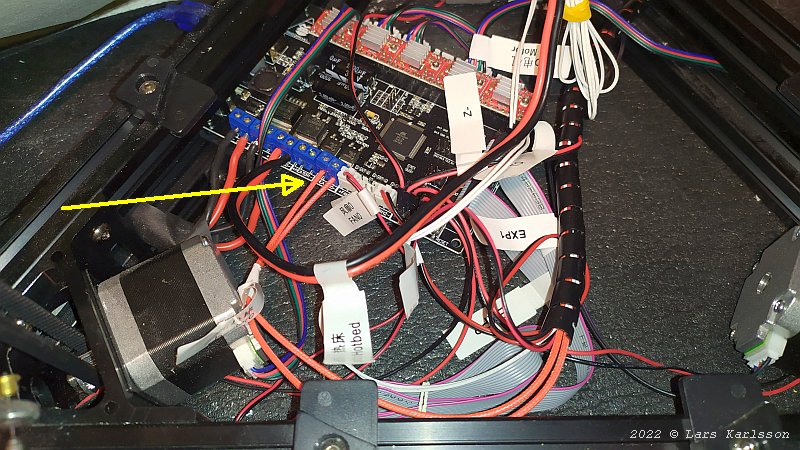
At last I connect the wires for the heater element for the nozzle. Before I can do a test print I have to do a new P.I.D calibration (page 15) and a new bed level alignment (page 13).

Go Back to content

Go Back
To page XIX, to be continued

Advertisement / Annons: