|
Advertisement / Annons: |
Project:
|
Contents:
Note: |
3: New powered USB Hub and power cablesMy old very compact USB Hub does only have 4 USB ports, now if I want to connect a second camera and USB powered dew heaters I need more USB ports. Powered USB Hub: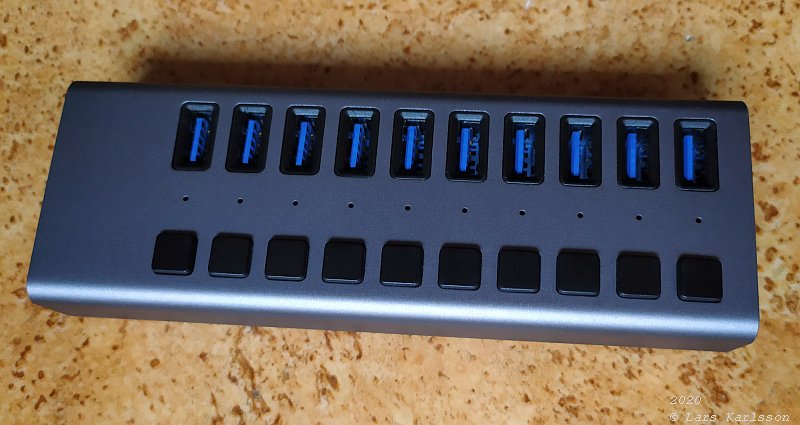
I found this USB Hub, it looks that it's made in Sweden. It has a huge number of ports, 10 USB ports and what's really good, it's powered by 12 Volt, no need for the 12 Volt to 5 Volt converter anymore. It can deliver 48 Watts, almost 1 Amps to each port, one single port can handle 2 Amps. It has USB 3 standard, 5 Gbit/s. There are also a On / Off button to each output, maybe handy when I have the dew heaters operating. I had preferred without these switches, but it's hard to find a 12 volt powered USB Hub. The size of it's 152 x 53 x 24 mm, much bigger than my earlier but still very compact. I operate at battery voltage, 13.7 Volts, the input this hub is 12 Volts. I have to do some test that it don't blow up in a big smoke. Plan how to use the USB ports:
No problem to use all ten ports. I can move the GPS module to the PC and then get one more port. * Today I use the PHD 2 software to drift align the polar axis, maybe PoleMaster or similar device give a better and faster solution. Information about QHY's PoleMaster:
** In the future it had been very convenient to replace the PC with a Unix operated Raspberry. But for the moment too much problem to get this to work. My ver 2 Raspberry project. But something I can do and still running Windows is to replace my mini PC with one that operate direct at 12 Volt. Then it will be more compact without the 12 to 19 volt converter and more energy efficient. 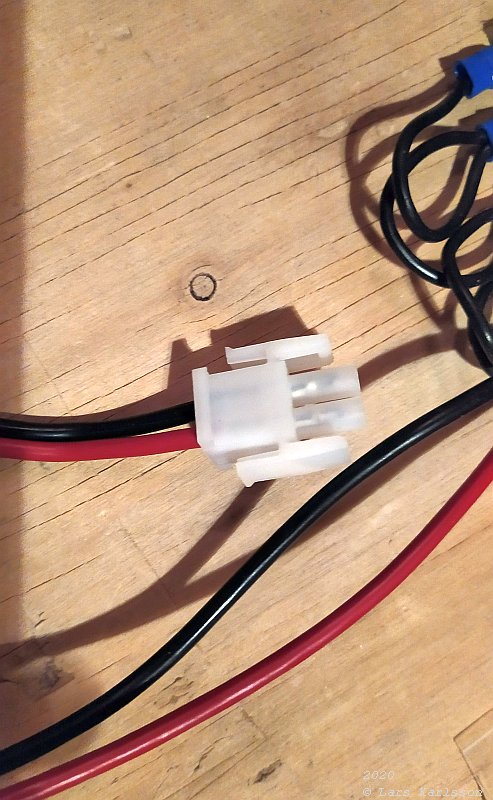
This is the power connector I use, Mate-n-2 standard, I think they use it a lot in robot kits. It can handle at maximum 19 Ampere. From the battery there are 2.5 mm2 cables, then the fuse box and from that 1.5 mm2 cables. Some less power consuming devices are connected with 0.75 mm2 cables. It's more to have a low resistance in the cable than handle the current. If only current the cables could have less area. 
The joint where I split up the main power cable. This joint is placed at the input to the mount, one cable connect to the mount. The two others go to the mounting bracket where the camera and other equipment are installed. Earlier I had a lot of connectors, but now I solder the cables together. Easier, take less space and cheaper. Now only one cable up to the mount. Earlier I had split them in two separate cables to reduce interference and have separate fuses. 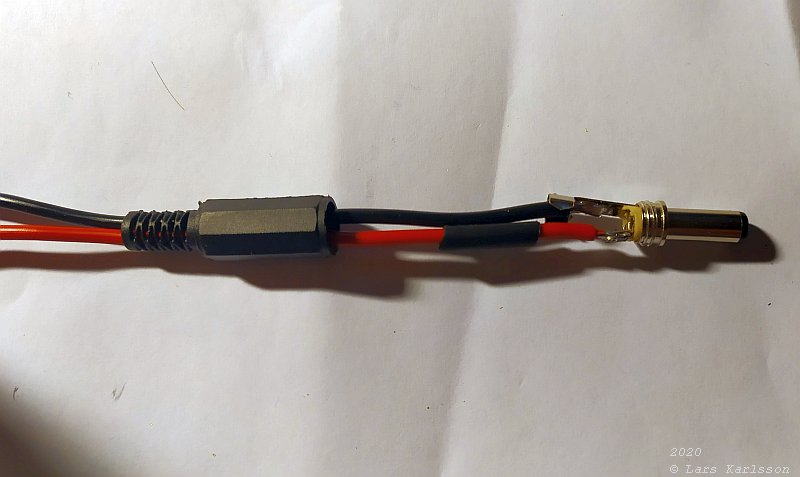
The connector to the USB Hub is a normal round 5.5 mm DC plug. In this case the tip is the positive, + 12 Volt. Check carefully when doing this, it differ between different make and normally it's only a 5 Volts power supply. I must in some way mechanically lock it to the Hub, otherwise the night can be ruined if it drop out from the socket. 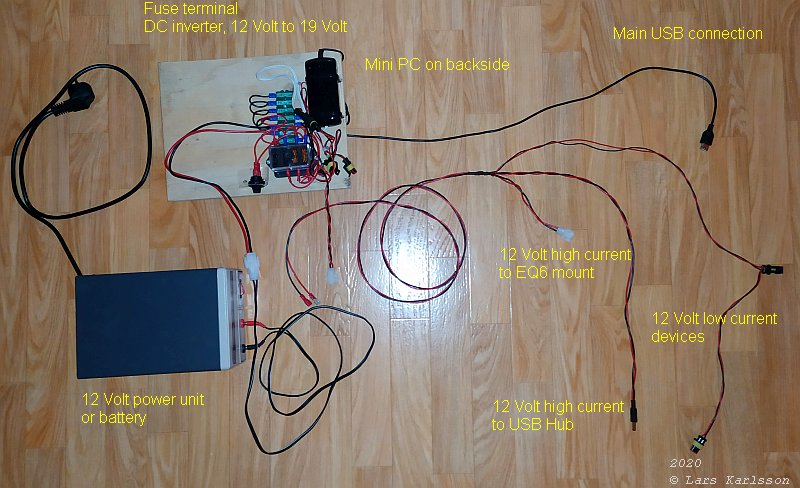
Overview of the electric power cables. 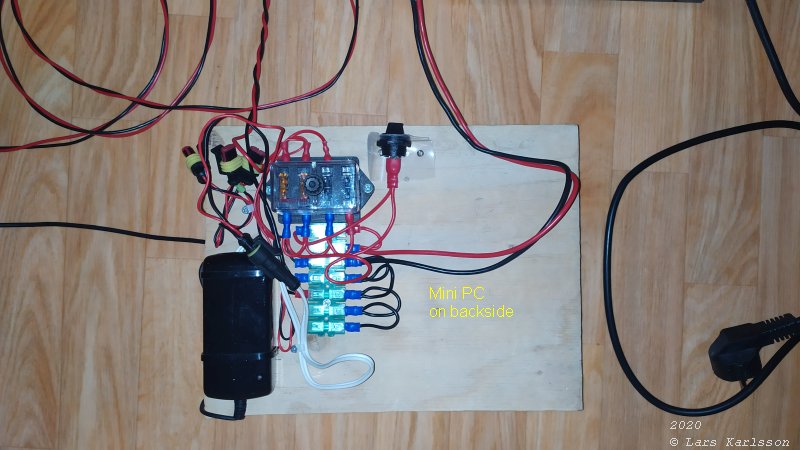
This is just a prototype during the developing of this system, the Mini PC is on the backside, it's an Asus EEE box PC. Later it will be installed in some sort of enclosure. I have also ordered an instrument, it would measure the voltage and the current. Good to have control over the DC current and the voltage when connected to a battery. When I have it running on battery power I use a 45 Ah car battery. I have the battery with the computer in a cool box. The waste heat from the computer heats up the battery slightly and the cooling box insulates from the cold. The battery doesn't last many hours as it is now. I have to get it more power efficient, and also find a much lighter battery. 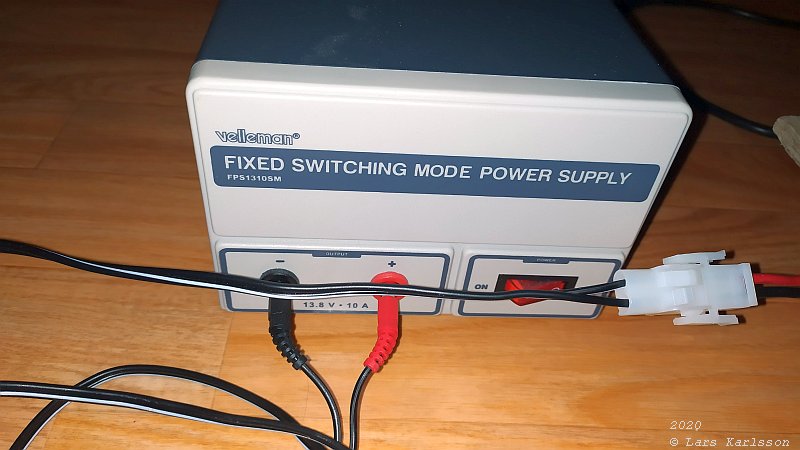
The power supply, it's not exactly 12 Volt, it deliver the battery voltage that is 13.8 Volt. The EQ6 mount work a bit better at this voltage, when power it with only 12 volt it signal that the voltage is too low. This power supply can deliver 10 Ampere. 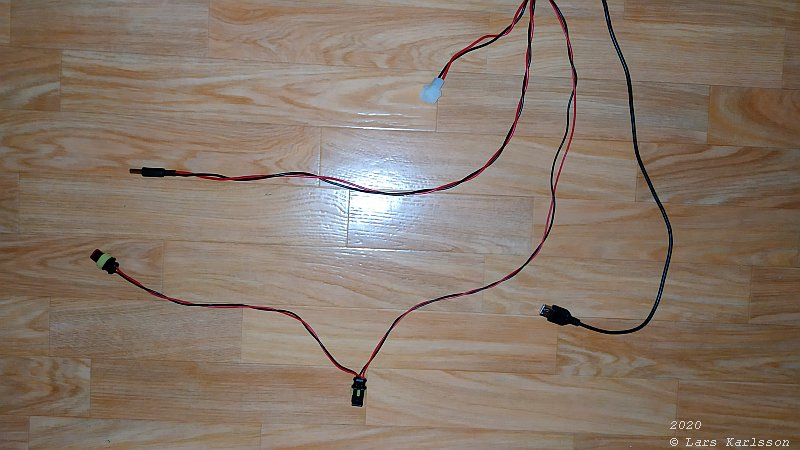
From the mount the main 12 Volt power cable split up: one to the mount, one to the USB Hub, and the last to other low power devices. These cables are twisted to reduce the electric magnetic field.
|
|