|
Advertisement / Annons: |
My astronomy project:
|
Content:
Related projects:
Note: |
1, Introduction:Even this is a bit old today, look at the latest Raspberry Pi5 with 64-bit OS: Raspberry Pi5 setup. My earlier project when I tried to built an astroserver with a Raspberry Pi2 B+ never went very well. The idea and the software KStars / Ekos were good but the power from the processor was to weak. You can read about this old project here: Project KStars IndiNow after a couple of years of development the Raspberry is much more power full. The new model has the model name Pi4 and now it has 4GB of RAM and two 4K HDMI outputs. The CPU is still a quad core but a little bit faster. https://www.raspberrypi.org/ products/ raspberry-pi-4-model-b/ Raspberry Pi4It's still very cheap and you get much for the money. It has as the earlier model 4 USB ports of which two of them now are of USB 3 standard. One LAN port and a Wifi. I bought a 32 GB microSD card to it, it's used to store the software on, it's like a micro hard disk. I also bought a big passive cooler, it get hot when processing. One problem with these SD cards are that are not constructed to write and read often, it wears out the chip. More modern SD cards has something called wear leveling, that's a technique that change the area the SD card store the information on. Then it will last much longer. I also bought a much bigger card than needed to let it have more area to write on. Info: SD Cards to Raspberry: https://reprage.com/ post/ what-are-the-best-sd-cards-to-use-in-a-raspberry-pi What are the best SD cards to use in a Raspberry Pi?Important inforamtion: There is so much that have changed since my last project so I start a new project, this one. You can use it as a tutorial also. 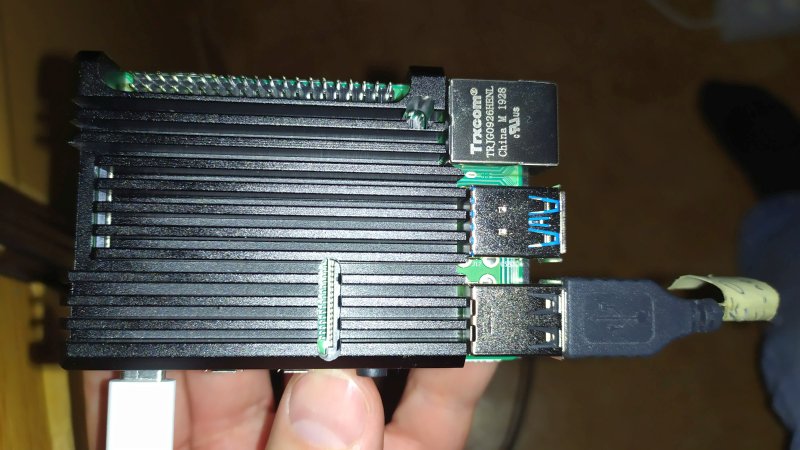
This is how it looks, very small and low power needs, a perfect solution for a portable astro server. See page 7 on this project where I did a simple battery power test. The contact list at top let you attach extensions, one is a driver for stepper motors, can be used as focuser. My plan is to use it with a Linux op-system, Astroberry is a special version with all related software collected. It's is also possible to use Windows, but nothing I have tested. If I get this to work it will be a revolution with my portable equipment.
|
|