|
Advertisement / Annons: |
My astronomy project:
|
Content:
Related projects:
Note: |
6, Setup INDI Control Panel 'Canon DSLR':The last thing to setup is the camera. In my case a Canon EOS 6D DSLR. Note this is only the first setup, later I will go back and optimize the settings. Canon DSLR: Main Control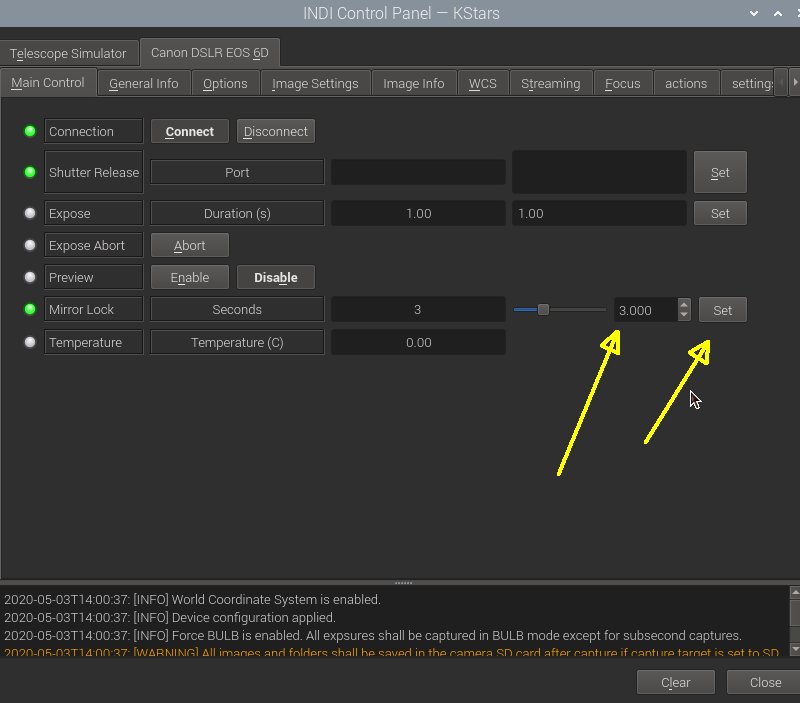
I always use the camera's opportunity to have a delay of the mirror to reduce the vibration. Note: the mirror lockup must also be enabled in the camera. A 3 seconds delay should be enough. Canon DSLR: Options, Bulb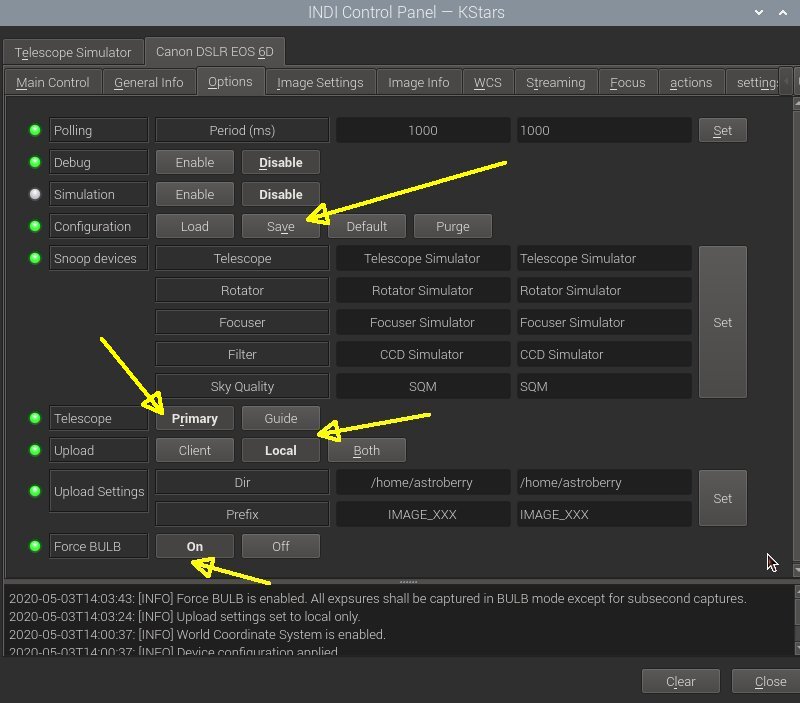
With this profile I will store the image on an USB stick attached to the Raspberry, the details comes below. Don't forget the 'Save' button when you are finished. Canon DSLR: Image Settings, ISO format etc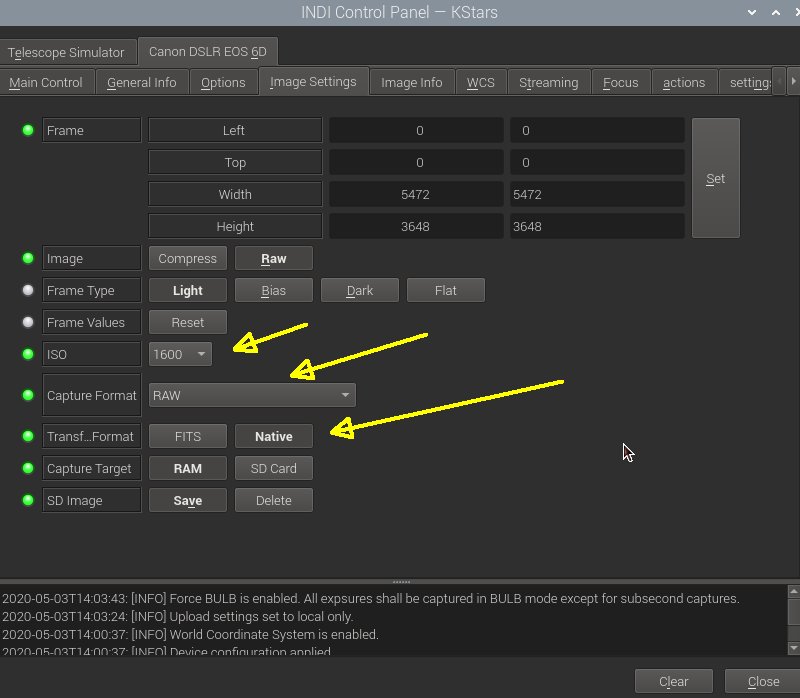
Normally I use the 1600 ISO setting, but sometimes 800 or 3200. The 'Capture format' is the format you get from the camera, you can't have combinations of RAW and jpg, only one of them. I store the images in its native format (RAW), but internally it use the FITS format. Canon DSLR: Image Info, camera data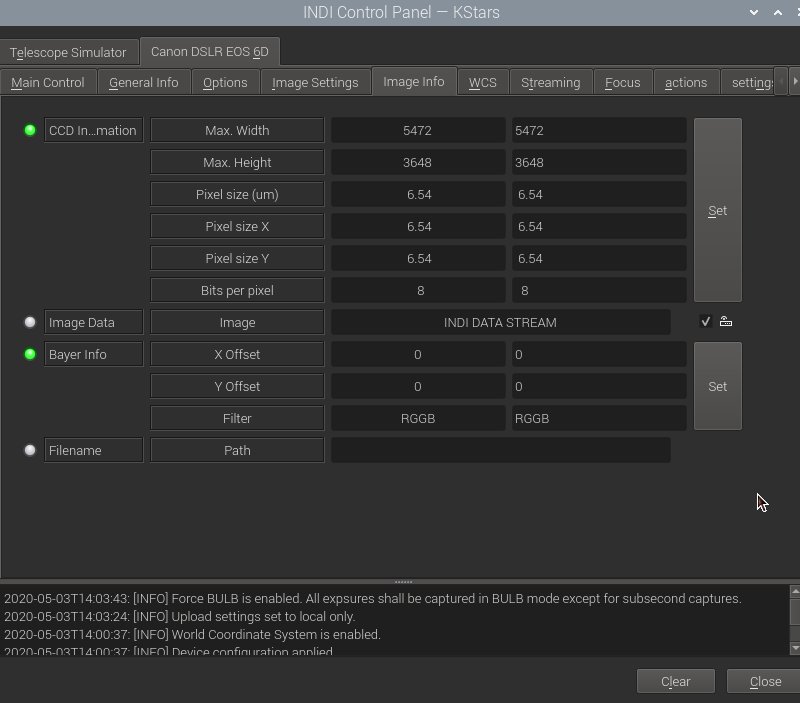
Check that the camera data is correct. Bits per pixel shall of course be 16 (14), have to change that later. Before you leave the Control Panel, go back to Options menu and Save. Profile: CCD & Filter Wheel, directory USBChange to profile menu and 'CCD & Filter Wheel' menu. 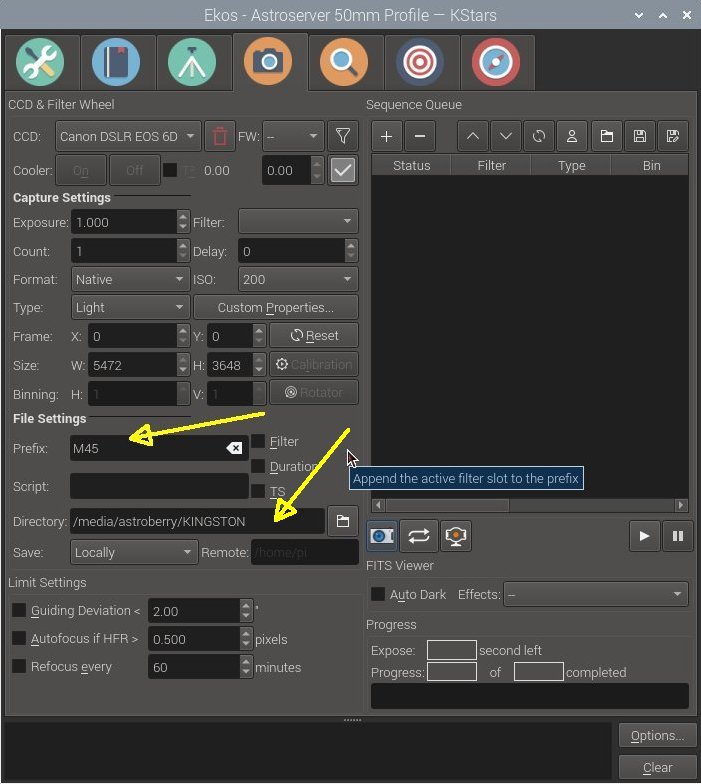
Set the Prefix that relate to the object you plan to photography. Set the directory where you want to store the images. I have an USB stick to store it on. 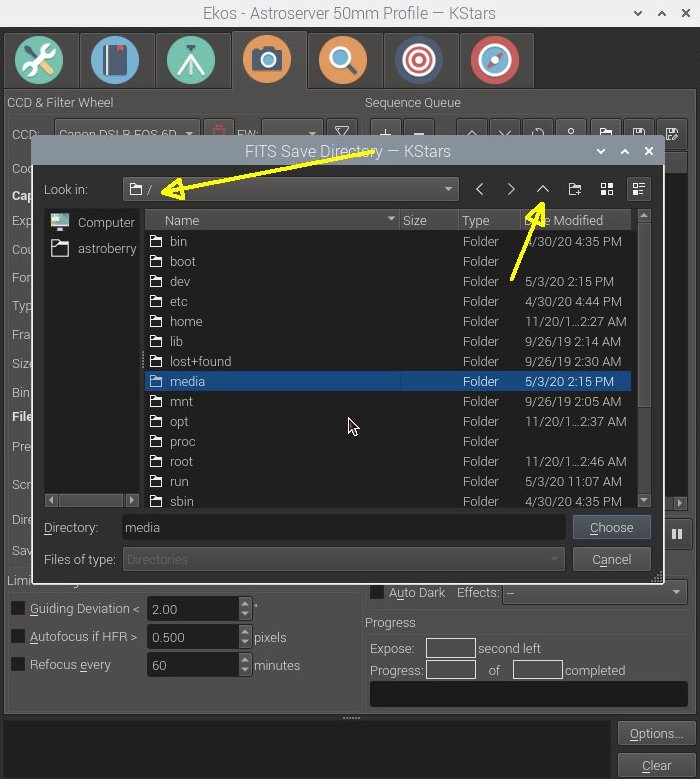
To find the USB stick, go all the way up in the directory tree. Look for folder 'media', double click on it to open it. Note: This could be different on your Raspberry, it depends on the setup. Profile: CCD & Filter Wheel, directory USB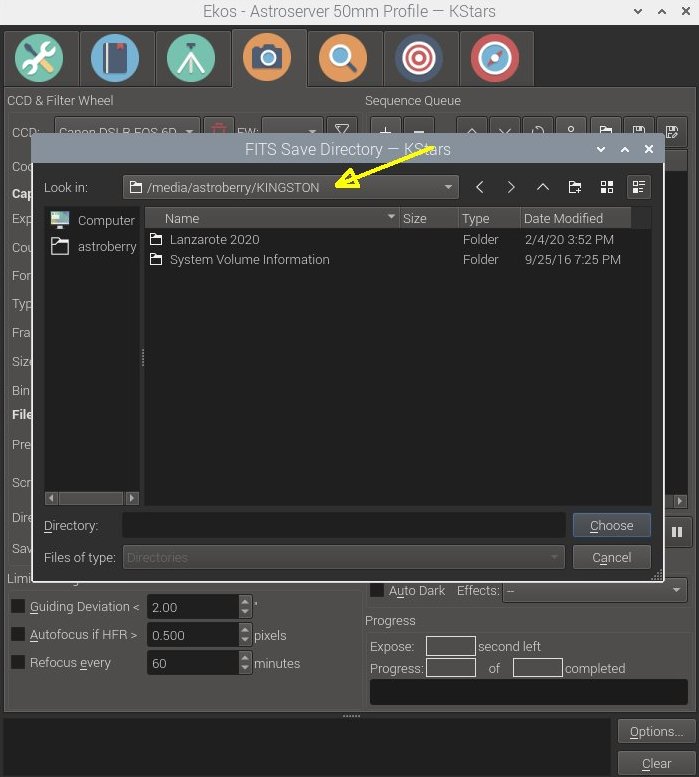
I found my USB stick at the /media/astroberry/KINGSTON folder. Astroberry was the user name I chose in the beginning. Kingston is my USB stick. Profile: Focuser
This is the focuser menu, I will setup it later when I have a clear night to test it. I have never used Raspberry with auto focus camera lenses earlier so it's new for me and I need some practice. This focus function was a very big deal for me to move to KStars and Ekos, I hope I get better control of my focus with this, very exiting.
|
|