|
Advertisement / Annons: |
My astronomy project:
|
Contents:
Note: |
4: Find north and level mountThe construction is advancing further from steel plate to the pier and now a first test. The goal of the evening is to find the north so that the hole for the stop bolt can be drilled and mounted. There is a stop bolt adjustment screws on mount head that takes support against this stop bolt when adjusting the azimuth (lateral). 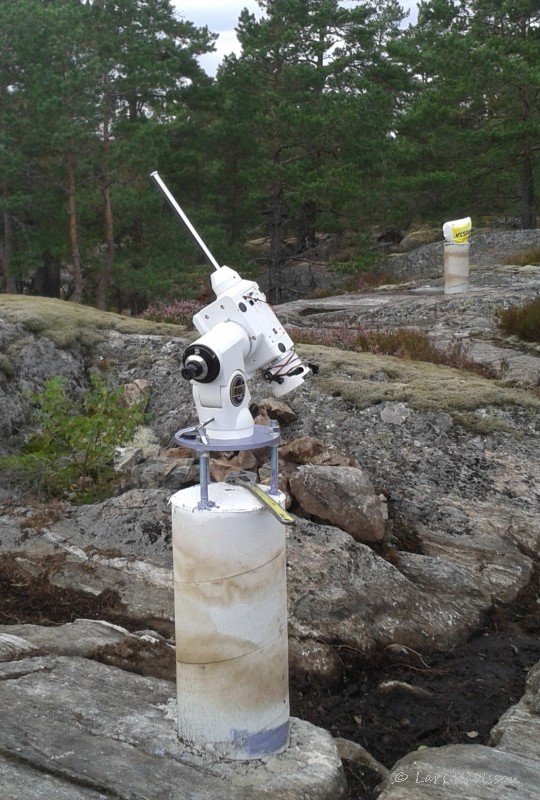
Starting with angling down the RA axis so I have some distant treetop to aim for. Twist round RA 180 degrees to see that the reticle in polar scope points to the same object. Yes a little tricky when the wind blows and the trees swaying side to side. But it went well in the end and it was already aligned close to perfect. 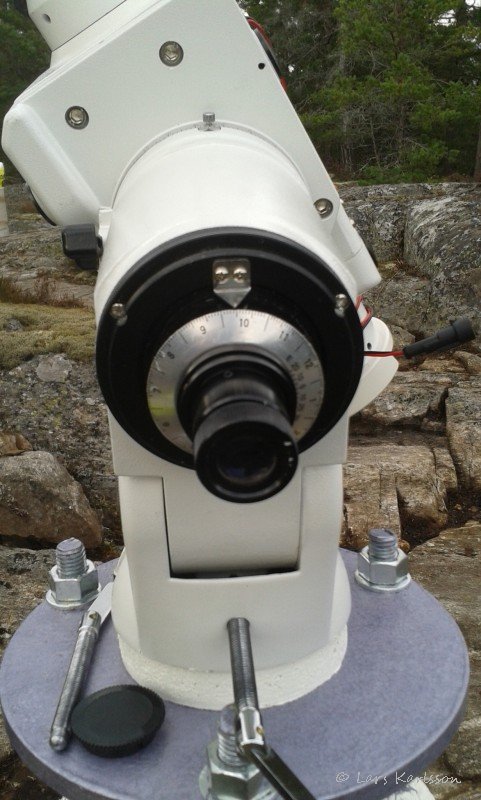
As is known, the polar star does not end up exactly with the Earth's rotation axis extension, but close to one degree. You should use the North Star as I am now, before I make a more precise drift align. Perhaps I'm most curious about how good it is. For this to be good must be engraved ring in polar telescope be rotated at the same angle as the stars at the time. Reading the manual for EQ6 and I'm is close to falling asleep by the boring text, all these scales must be turned from here to there. I choose instead to use the control program EQMOD that I use for installation. But first, are there other adjustments that must be made. 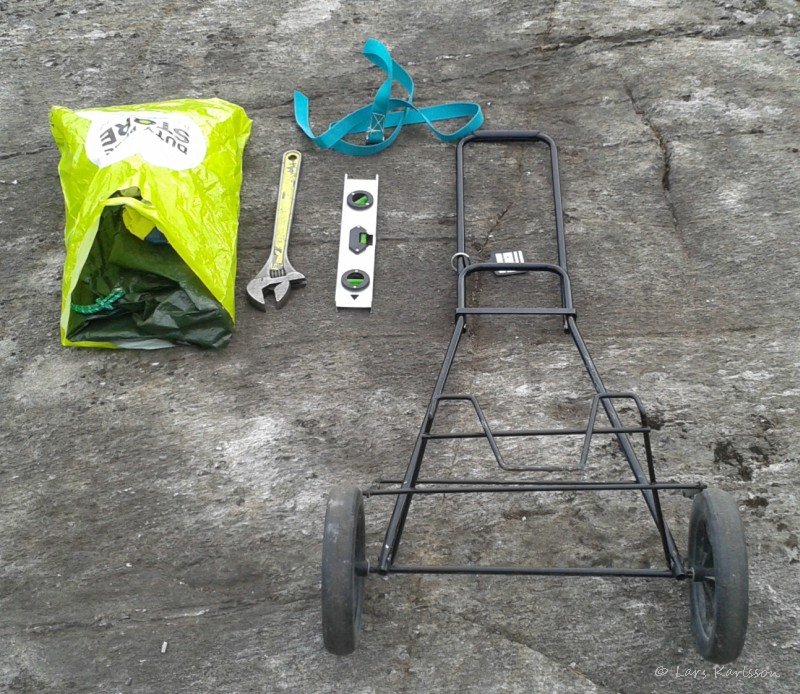
The toolkit for the evening, especially the spirit-level and the wrench for fastening bolt. The rain protection to fast protect the telescope in case of rain, i live in Sweden! The wagon is of great help when the heavy equipment must be taking up and down the mountain. 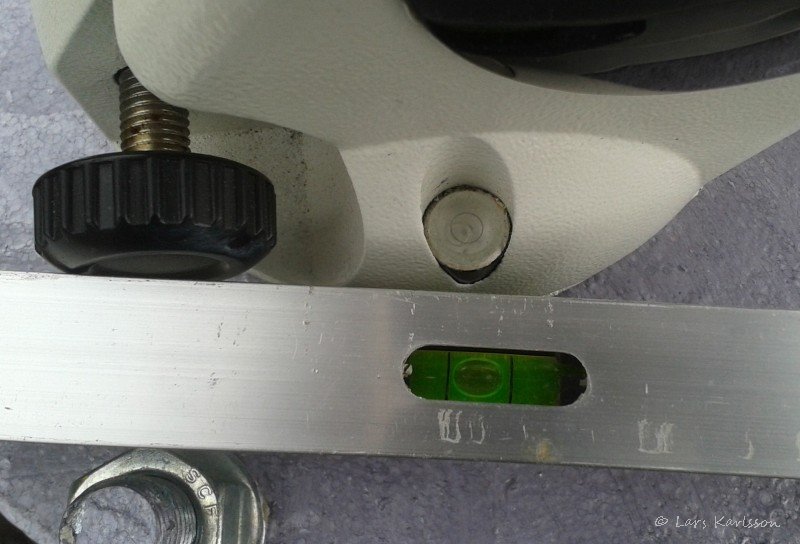
First adjust the steel plate so it is in level with a spirit-level. Here we see that the integrated spirit-level is not of good precision. 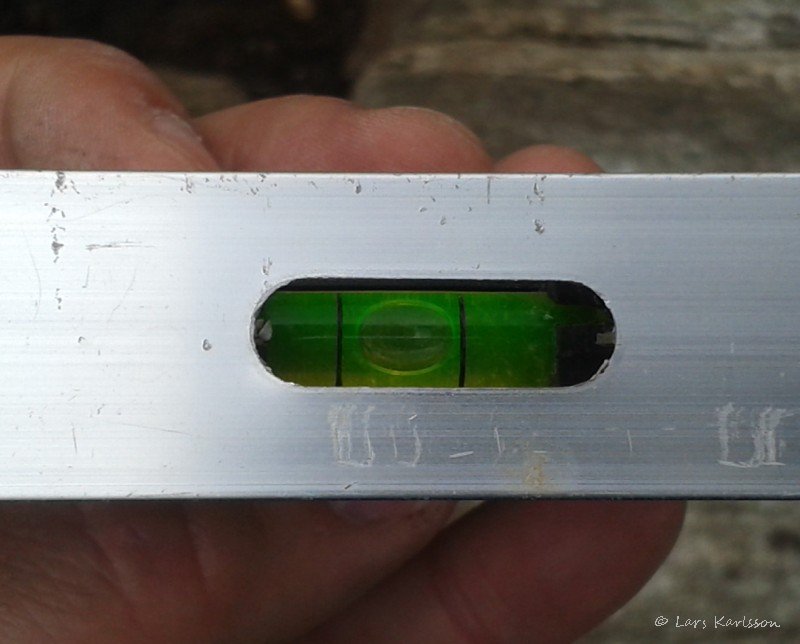
The next step is to adjust the RA axis, it also adjusted by the spirit-level, find where the horizontal angle is. Sets the RA scale on 6h, then turn the RA axis to 0h. It is difficult to find a surface that is parallel with the RA axis to hold the spirit-level against. I hold this spirit-level against the shaft where the counterweights are placed. This spirit-level worked well but later I will attach other permanent so I get a built-in spirit-level to adjust axis with. Need surely to do this several times if the motors loose there position, then I want it to go easily and quickly. 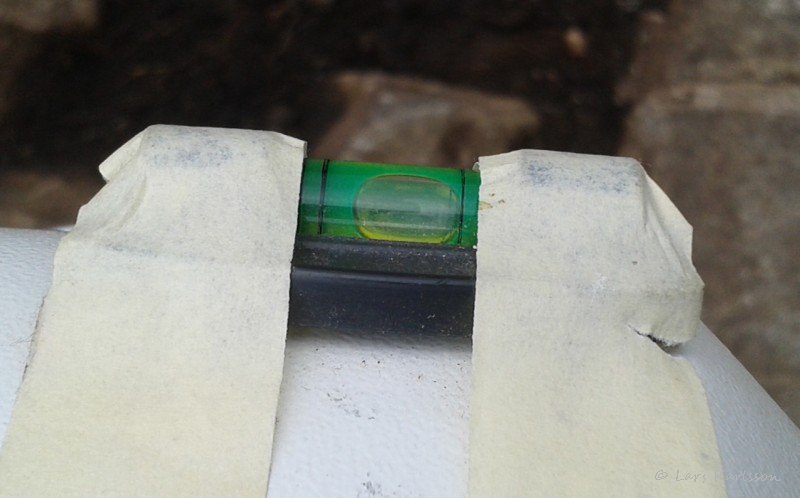
The next step is to adjust the Dec. axis, do the same here. Finds the horizontal position with a spirit-level and set Dec. scale to 0 degrees. Then rotates the Dec. shaft to 90 degrees. 
Now I have reached the point when to start peeking in polar scope. Steering controls from EQMOD and set Dec axis so polar scope can see through the bore in the shaft. There is a special routine in EQMOD for polar alignment, choose the position at 6 o'clock. It is intended to be able to select various modes to avoid Instrumentation hit mounting. In my case, I have nothing that stands out so it does not matter. Adjusts the mechanical assembly in azimuth and altitude so Polaris sits on the cross. Then I adjust the latitude so Polaris sits on the circle in the 6 o'clock position, i.e. straight down. Now I run the engine in RA axis until the small ring at the major points in the middle of the North Star. The next step is to store the position in EQMOD, then give the command so that mounting turn the RA axis so that the selection in the polar telescope is true for the North Star at that time. Adjusts now once again the altitude and azimuth to the North Star, now this time end up in the ring in the circle of the polar telescope. I have now if everything went right a rather precise position for north direction, a magnetic compass is not good enough. I later take a few test shots to see that the direction is indeed right before I drill the hole for the stop bolt. 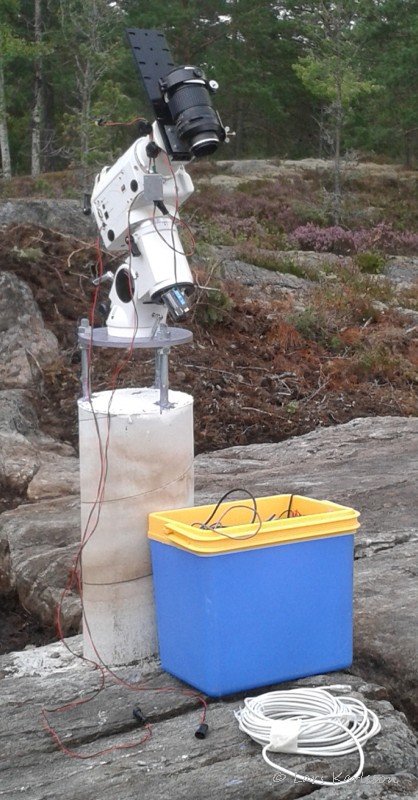
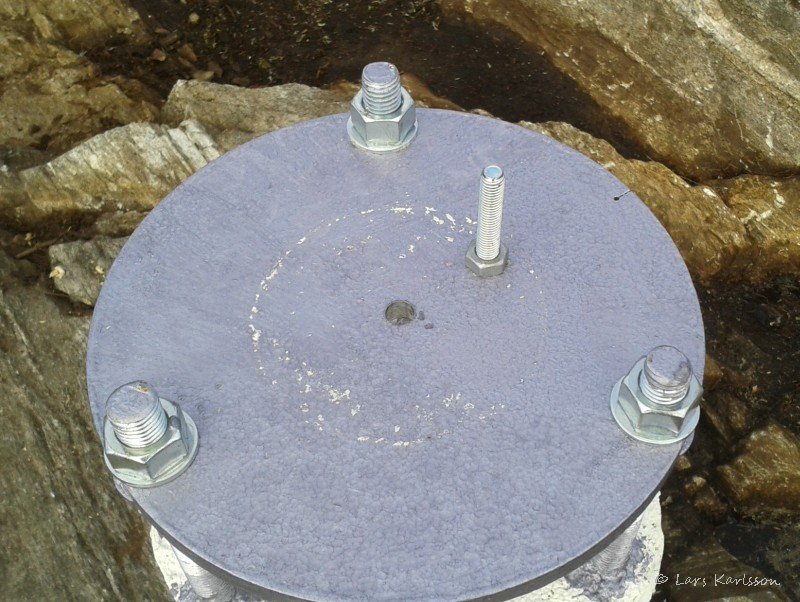
So here's the stop bolt fastened. It is an M10 bolt with a nut on both top and bottom, to be able to adjust the height. Shall later make upper part on both sides flat against the adjusting screws. 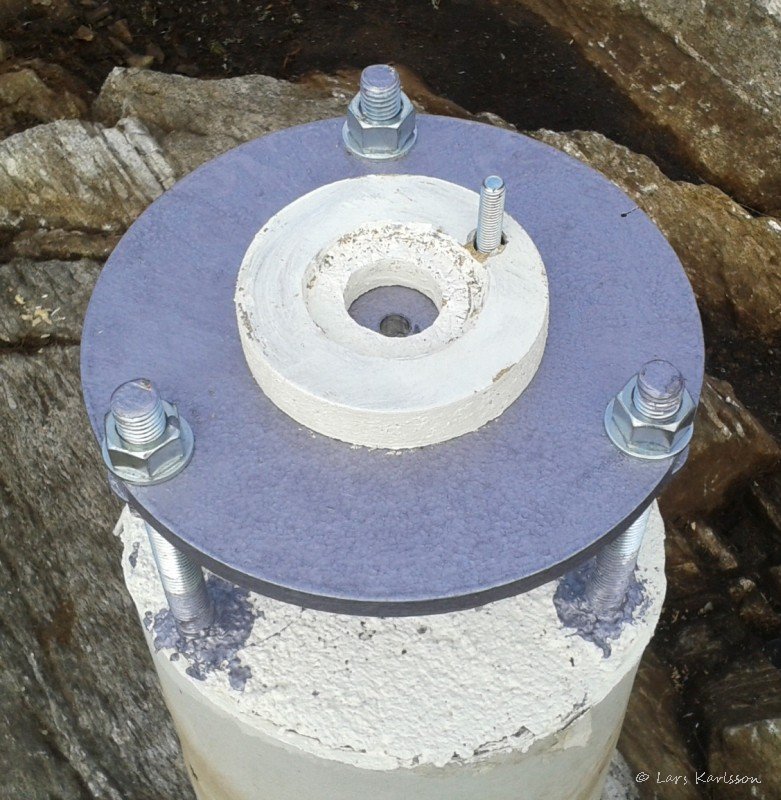
A temporary spacer is made of a wood so I will be able to do some test before the steel distance is manufactured. A hole has been taken up for the stop bolt into the distance and a recess for the nut. 
Put on the camera and doing some testing, pointing quite wrong, but it is a 165mm lens so not so sensitive to pointing error. It is a Pentax 6x7 with over 80mm in both the back-focus and image circle and wonderfully low vignetting. The opening is f2.8 but I normally use the f4 setting. 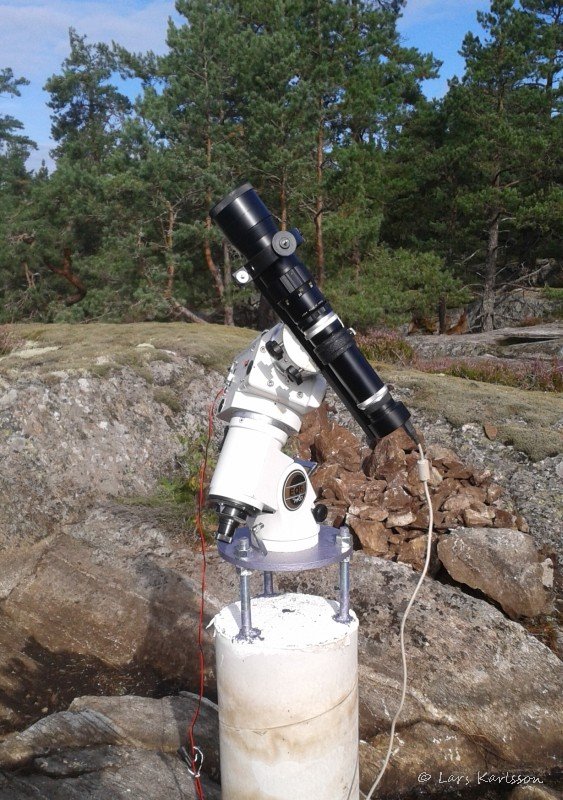
Here is the guide telescope mounted, a 400 mm camera lens with a QHY5 CMOS camera attached. Later the guide camera shall be connected to an off-axis adapter mounted on the main telescope. 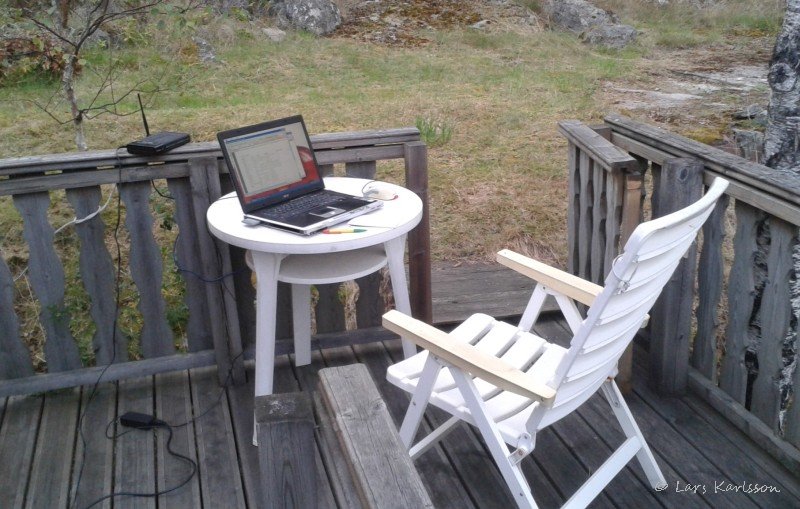
A lovely warm evening and the observatory's control center could be moved out and I got closer to run up to the mountain. Yes, it was so much running running up and down between the laptop and telescope. All connected over a network and the telescope have a server computer that is remotely controlled by VNC. Normally I have a 24" screen to the laptop where I control it from, work very well. Although my computer broke down one night later. But the astro server continues to work regardless of what happens with other computers, and continue to shoot astronomy photos. 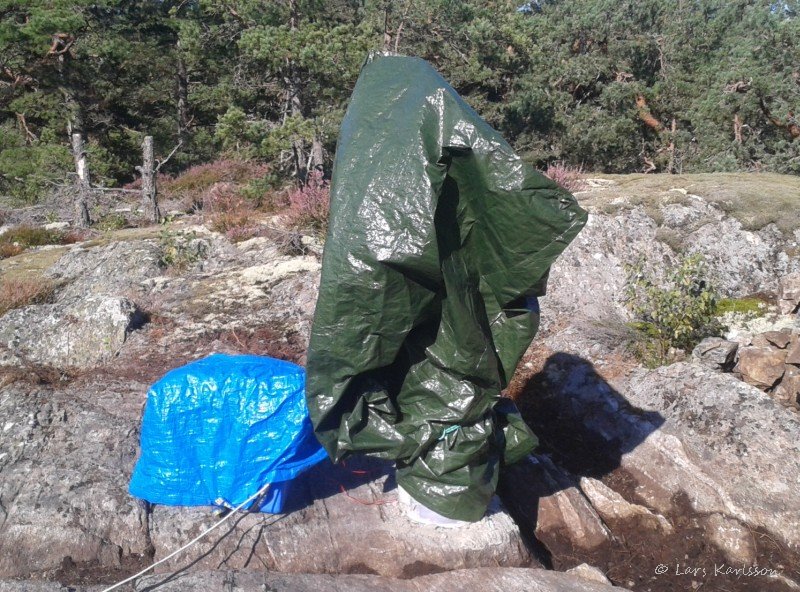
It took three days because of the clouds came and went, yes, most came. Rain protection came in handy as a protection to the telescope, under the blue bag is the server computer and the battery that I wrote about in another project.
|
|