Astrofriend's homepage

www.astrofriend.eu
Share: Twitter Reddit Facebook Gmail Gmail Email
Search Astrofriend's homepage:

Valid CSS!

All pages shall now have been validated

Info Cookies (Kakor) / GDPR

Navigation

Advertisement /
Annons:

Twitter @AstrofriendLars

Follow Astrofriend

Tutorial News

Advertisement / Annons:

Project:
HEQ5 as portable mount


Contents:

  1. Introduction
  2. EQDIRECT from D-sub to RJ45
  3. Power terminal of HEQ5 changed
  4. Installing the 300 mm lens on HEQ5
  5. Rewiring the electric cables
  6. Connecting the Raspberry
  7. Setup GPSD
  8. Setup GPS NMEA
  9. Power consumption
  10. Battery power cables
  11. Tweaking auto guiding parameters
  12. Rowan Belt Modification Kit
  13. Making the tripod to a low rider
  14. Redesign of mount head details
  15. Raspberry Pi4 bracket
  16. Brackets: temperature sensor, spirit level and stepper motor
  17. Transport box
  18. EQDirect cable
  19. Brackets reinforced and adapt it to EQ6
  20. Cut the length of the GPS cable
  21. HEQ5 and TS130 refractor ?
  22. To be continued

Related projects:

  1. HEQ5 as portable mount
  2. Pentax 645 300 mm ED IF f/4 lens
  3. KStars / EKOS and Raspberry Pi4

Note:
I take no responsibility or liability for what are written here, you use the information on your own risk!


15: Raspberry PI4 bracket

The Raspberry processor has to be mounted on the dovetail somewhere. It take power from the USB HUB and I want as short cables as possible. Earlier it was only hold in place by a stripe. Now I want to make a more serious bracket for it.


HEQ5 mount head:

HEQ5 and Raspberry: Raspberry PI4 bracket

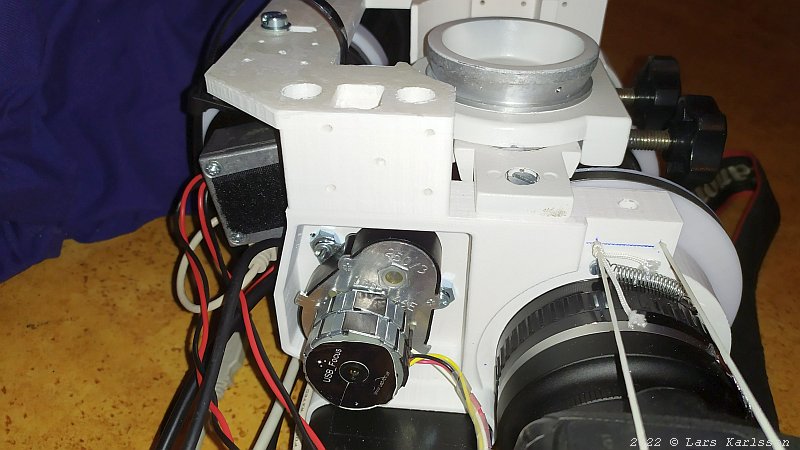
One of the better places is below the focus motor (image upside down). I already had prepared the place with a couple of M3 threaded holes.


HEQ5 and Raspberry: Raspberry PI4 bracket

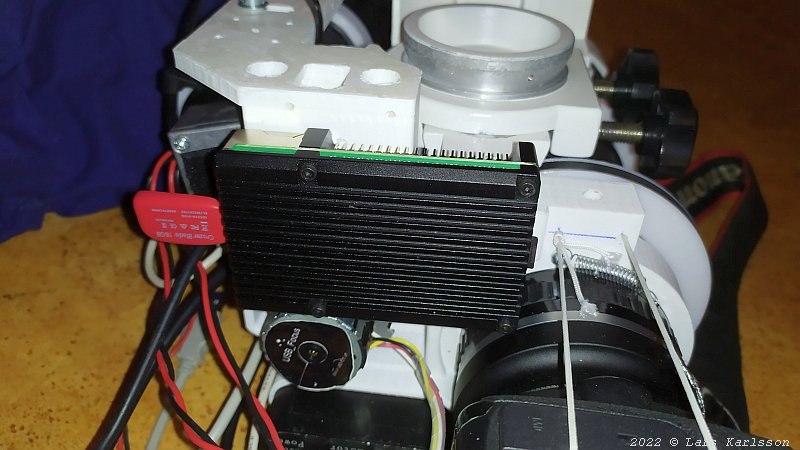
The Raspberry computer isn't big, from this place all wires will be short. Easy to reach the USB memory and the RJ45 socket on the left side.


HEQ5 and Raspberry: Raspberry PI4 bracket

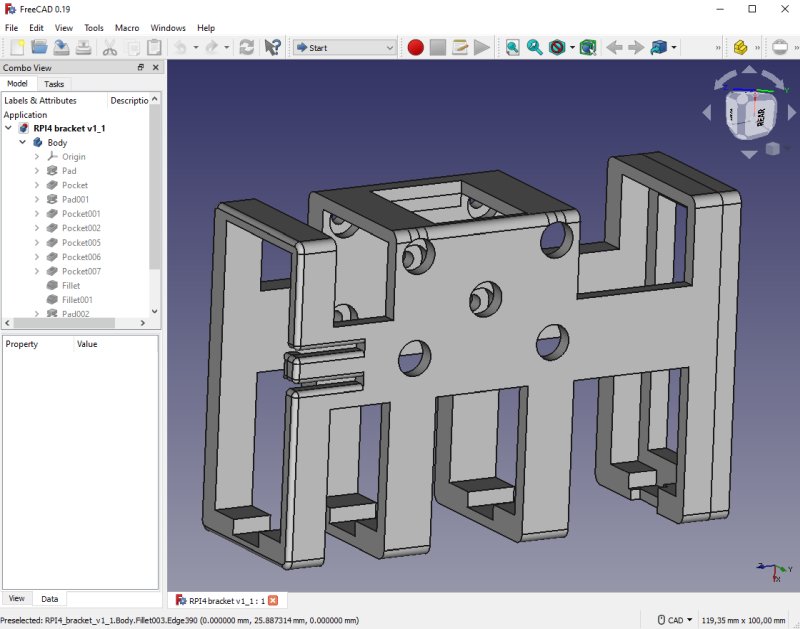
In FreeCAD I have designed this cage that will hold the Raspberry in place. In the middle to the left is a lock mechanism to not let the Raspberry slide out. Lot of openings to have the air cool it down.


HEQ5 and Raspberry: Raspberry PI4 bracket

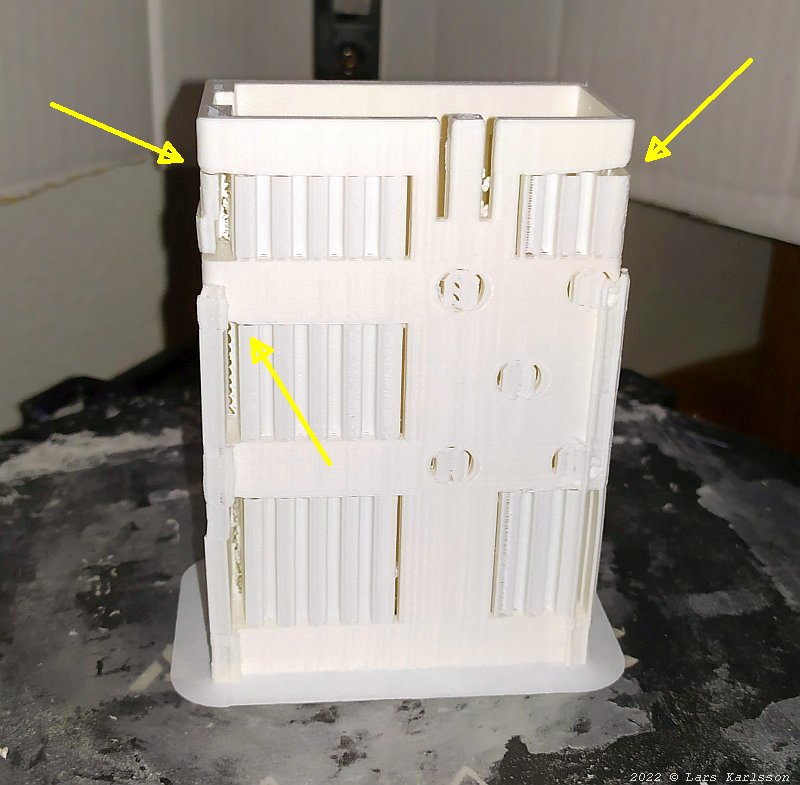
Waiting for the bracket to cool down before I released it from the printer bed. It looks more like a building with all the supports. When it have holes in vertical directions it must add these supports because it can't print in the air. I found it to be best to print it in this direction.


HEQ5 and Raspberry: Raspberry PI4 bracket

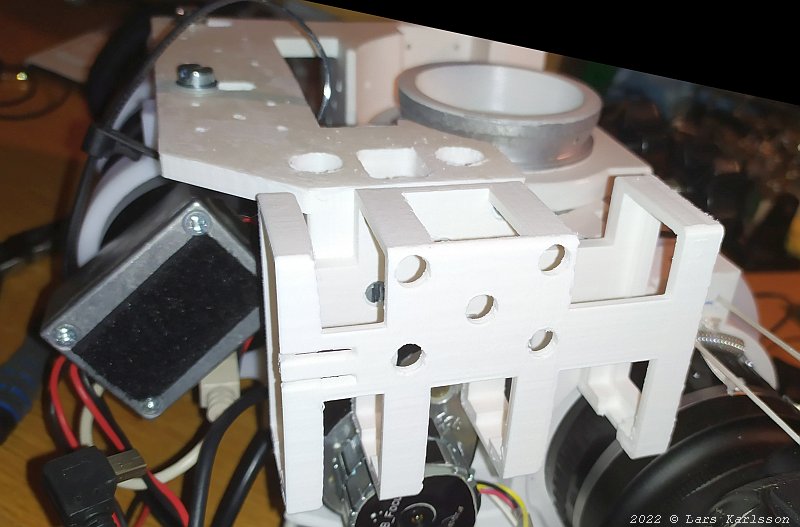
All support removed and glued together the cracks between the layers. Fits perfect, maybe a bit fragile but it's well protected in this area.


HEQ5 and Raspberry: Raspberry PI4 bracket

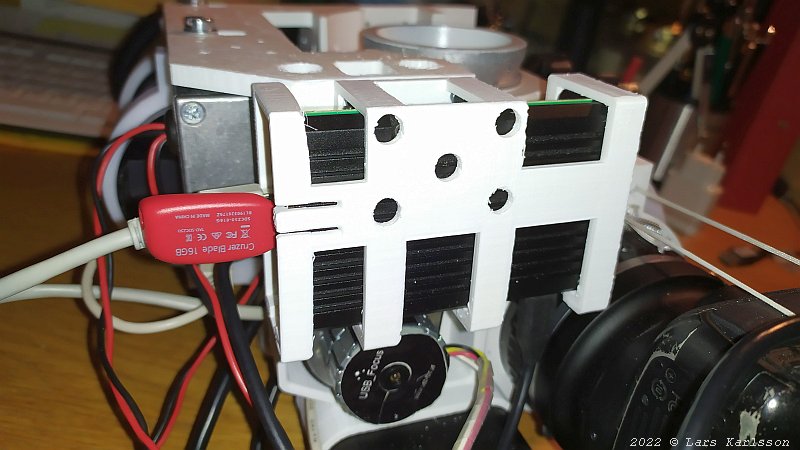
With the Raspberry installed and the Power USB-C cable connected, the black cable at lower right.


HEQ5 and Raspberry: Raspberry PI4 bracket

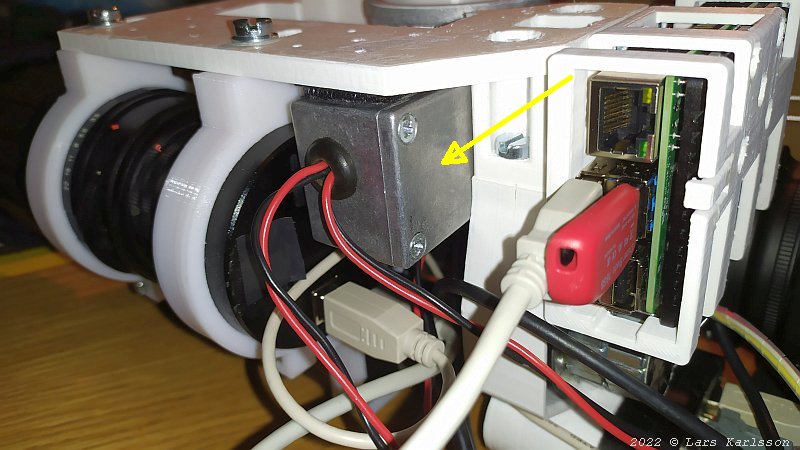
I placed the 12 to 8 Volts DC/DC converter behind the guide camera. It's an analog regulator, but only power the Canon camera and focus motor. No continuous power but peaks of 2 Amp at 8 Volts.

Go Back to content

Go Back
To page XVI

Advertisement / Annons: