|
Advertisement / Annons: |
Project:
|
Contents:
Related projects:
Note: |
19: Brackets reinforced and adapt it to EQ6It's now the second season with my HEQ5 compact astrophoto system. It has worked very well and I can now start to design further some small details to make it even better. Earlier I used ABS filament when I 3D printed the bracket, never got it very well and now I move back to PLA. Make the focus bracket adjustable: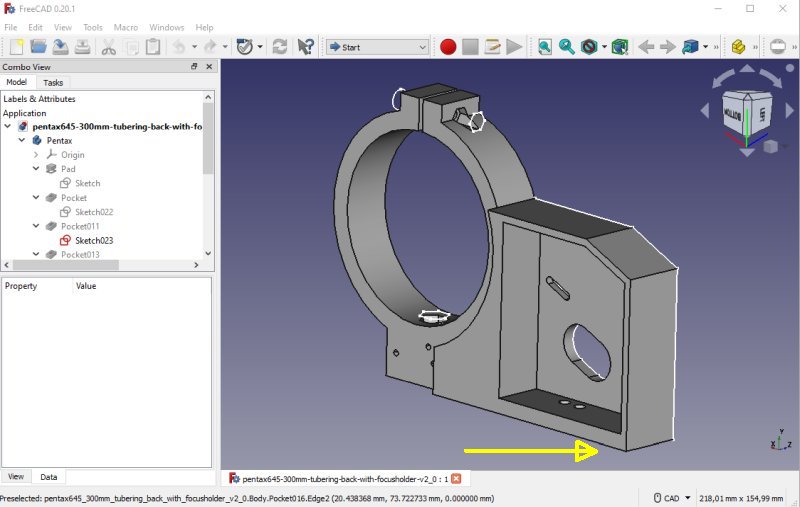
First I have designed a new focus motor bracket to make it left/right adjustable. I want it to be adjustable relative the guide camera. It's both for the balance and the space between them. To make that possible I prolonged the corner. 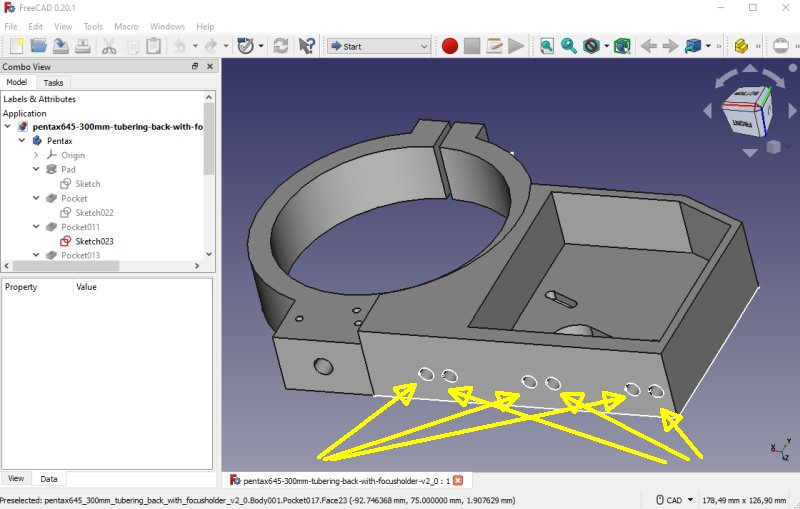
I make three new holes 8 mm to the right of the old holes, M6 threaded. 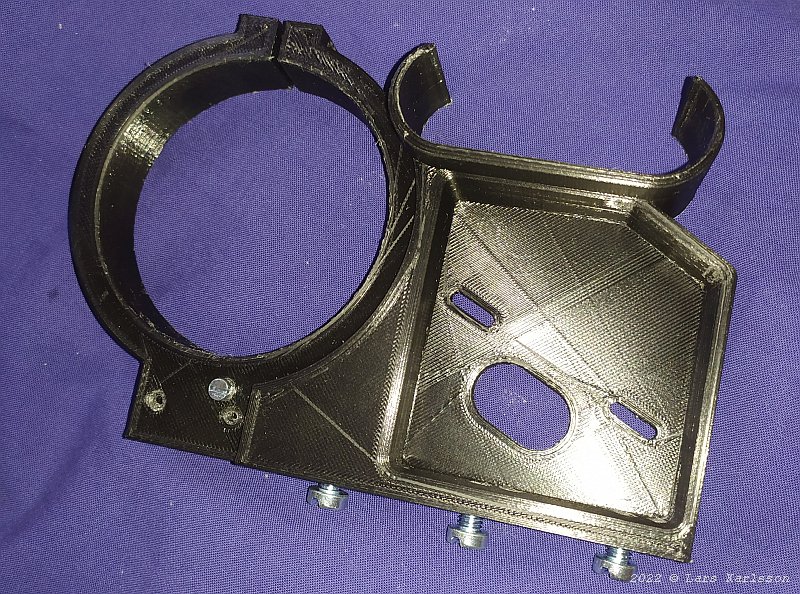
The focuser bracket 3D-printed in nice black PLA. Reinforce the camera system bracket: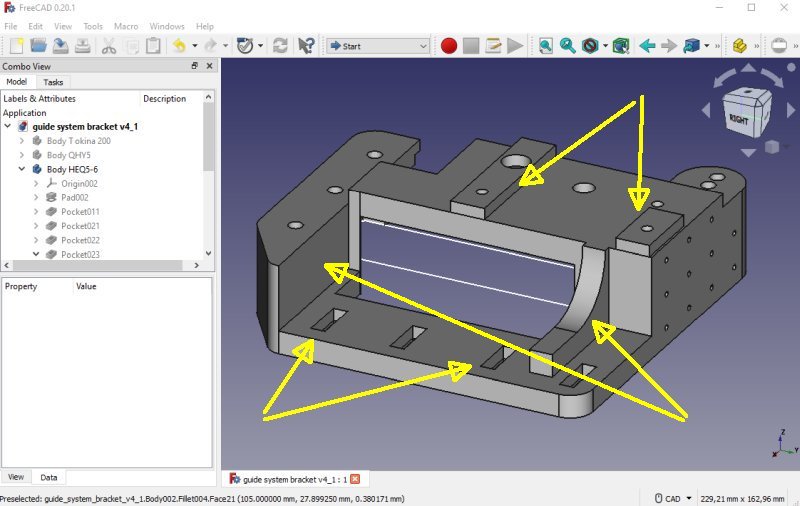
I have designed a new bracket for the camera system, the main lens and the guider lens. 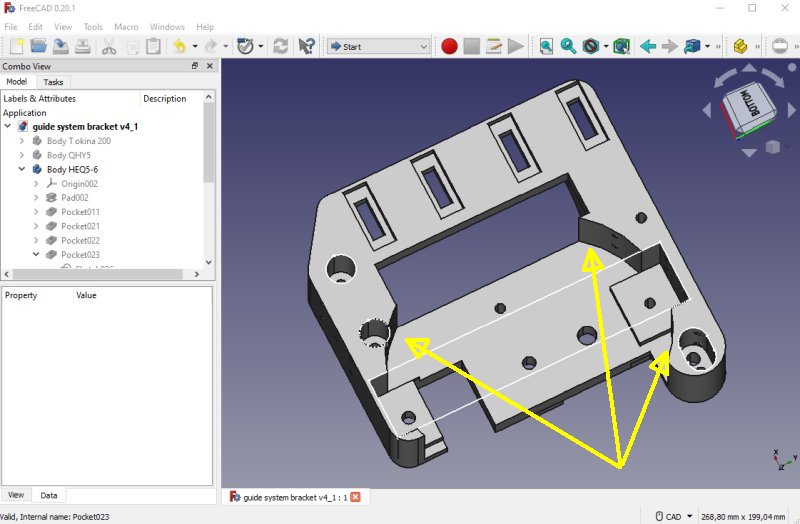
I have redesigned the end of the bracket that attach to the mount. It will make it possible to attach it to both my mounts, the HEQ5 and EQ6. The HEQ5 top pad has a diameter of 83 mm and the EQ6 108 mm, I increased the space to take a diameter of 110 mm. This bracket take at least 20 hour to print, I must be sure I get everything correct before I start the 3D-printer. 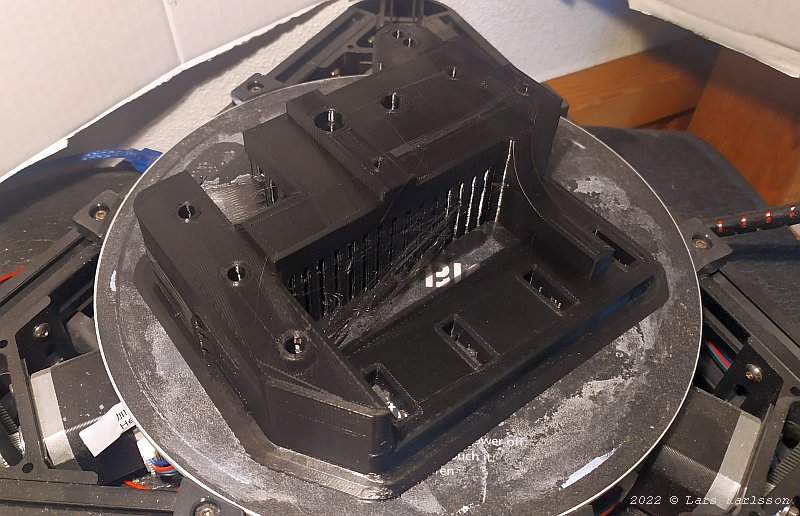
First time I tried to print this bracket it was to wide for the 3D-printer. After I rounded off the corners it got small enough to be 3D-printed. 
After 20 hours in the 3D-printer and some after works it's finished. It takes 300 gram of filament for this one. Compare to the first prototype it's much more stiffer now, it's also more flexible how to mount the other brackets. Assembling brackets together: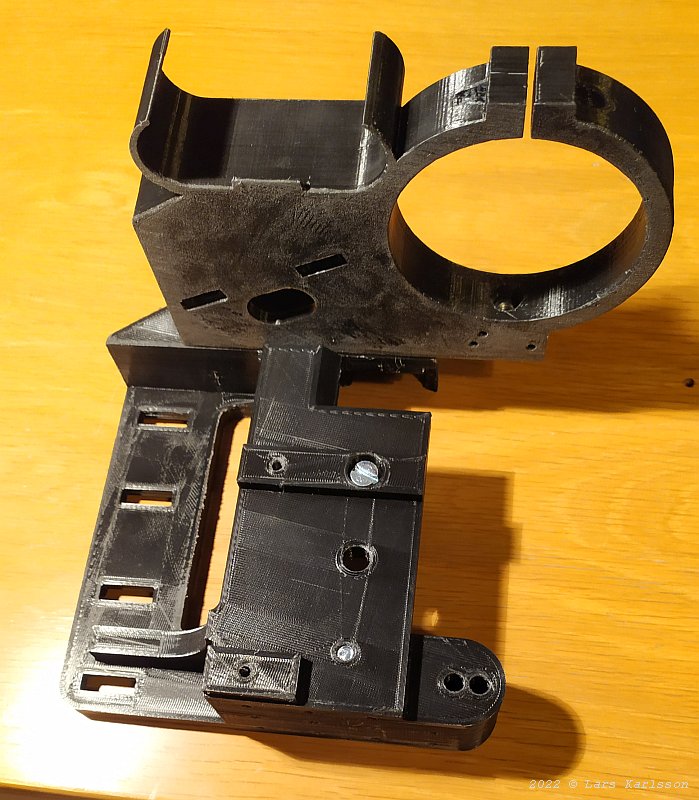
Three M6 bolts hold the brackets together. To the right space for the Pentax 645 300 f/4 lens. To the left space for the Tokina 200 mm f/3.5 lens which is used as a guide telescope. |
From the other side, to the right, space for the focuser motor and on top space the focuser driver unit. 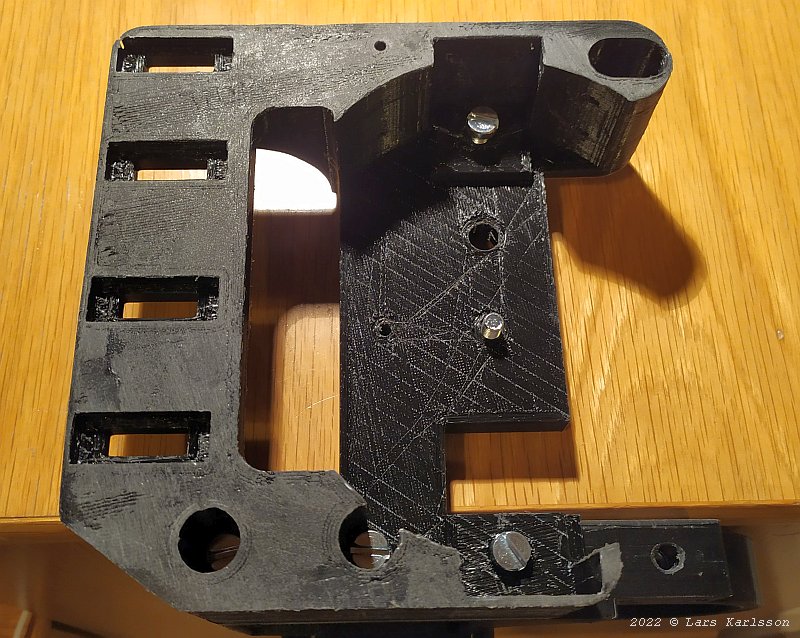
View from the under side, it's here the HEQ5/EQ6 mount connects. This is the big news, now I can install it on both of my mounts. I can have the EQ6 mount on the balcony and use it when it's not a perfect clear sky and do testing. The HEQ5 I have in the garage ready for a trip out to a dark place. This will help me a lot, if everything is too complicated and heavy to bring out there will be a lot of nights that will be lost. There are still points where it's a little bit weak. But together with the other brackets that reinforce the construction, it will be very stable. 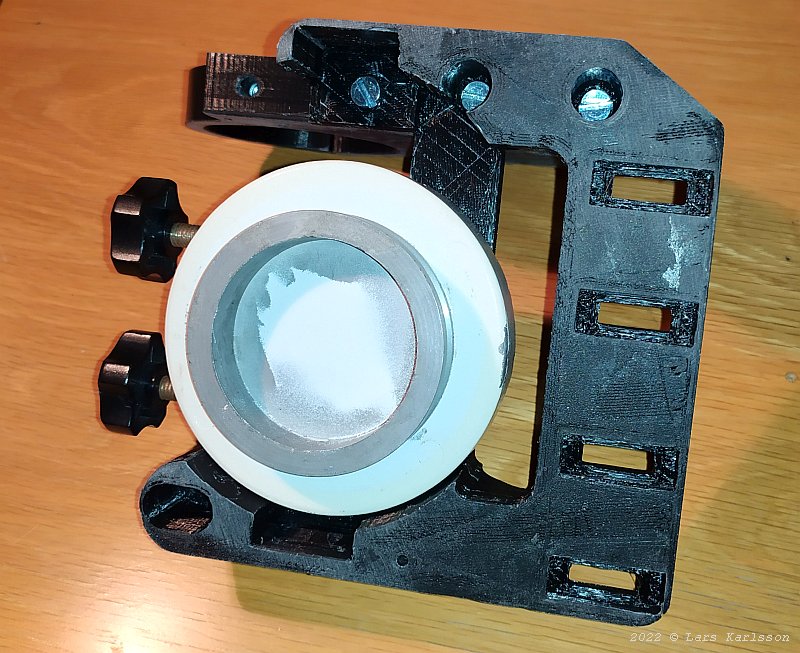
With increased space around the mount head it's now easier to get the camera system in balance, it can be moved 27 mm with the EQ6 mount and the HEQ5 can be moved even more. New guider telescope brackets: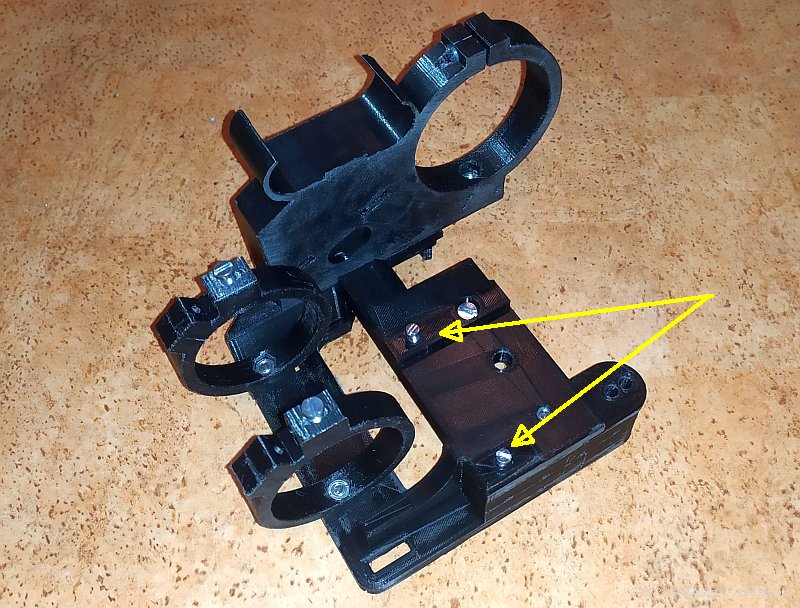
With all these modifications done I have also designed two new brackets for the guide telescope. I use the two new holes that move the guide telescope backwards 35 mm. With that the overall length decrease with 35 mm. In its earlier version it had the bracket on top that hold the USB hub. Now the HUB will have its own brackets mounted with the screws where the arrows points. 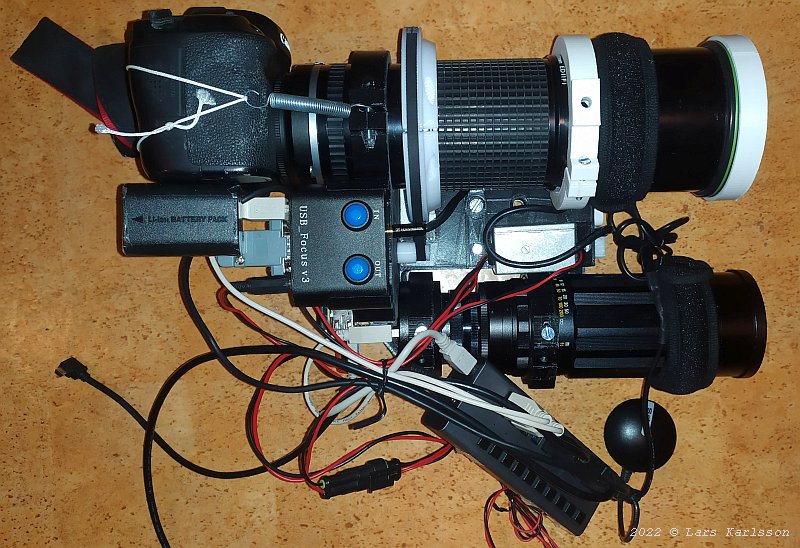
After I had moved over the equipment from the old brackets it look like this. 
The silver box between the lenses are the 12 to 8 Volt converter, it supply the focus driver and the DSLR camera with power. 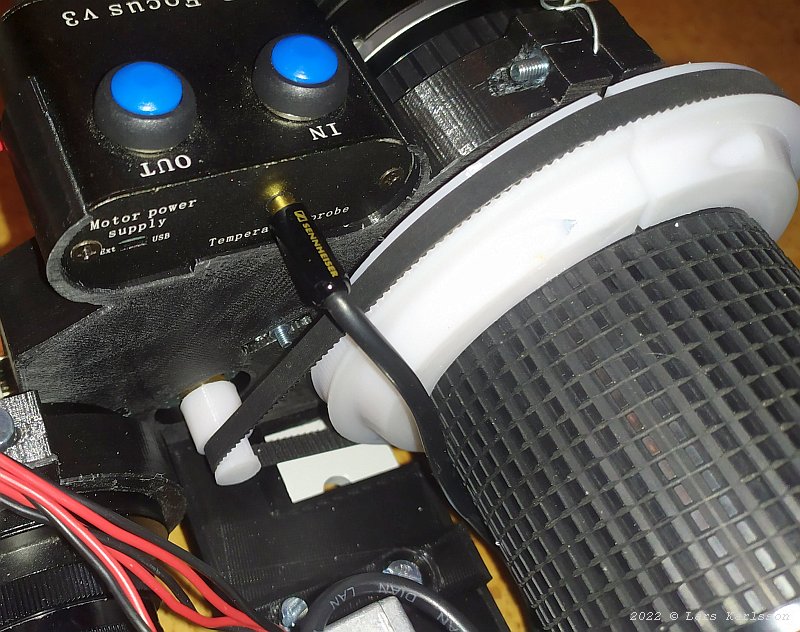
The belt drive system for the focuser with 3D-printed parts. 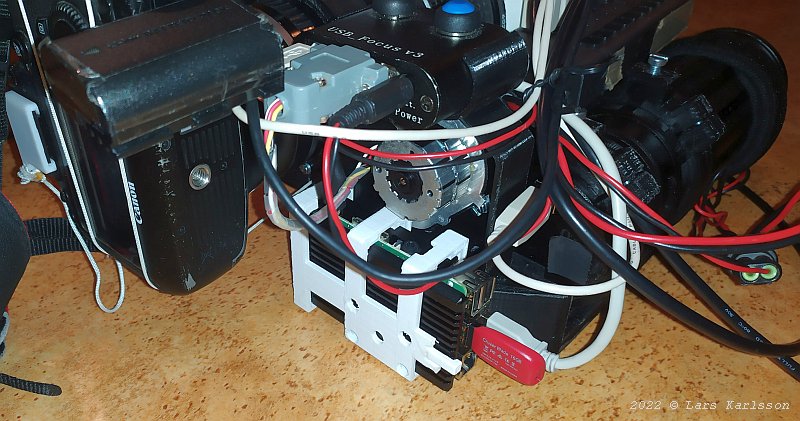
The Raspberry Pi4 computer that control the astro camera/mount system sits in the white cage. A new more robust one will be designed later. Above the stepper motor for the focuser. |
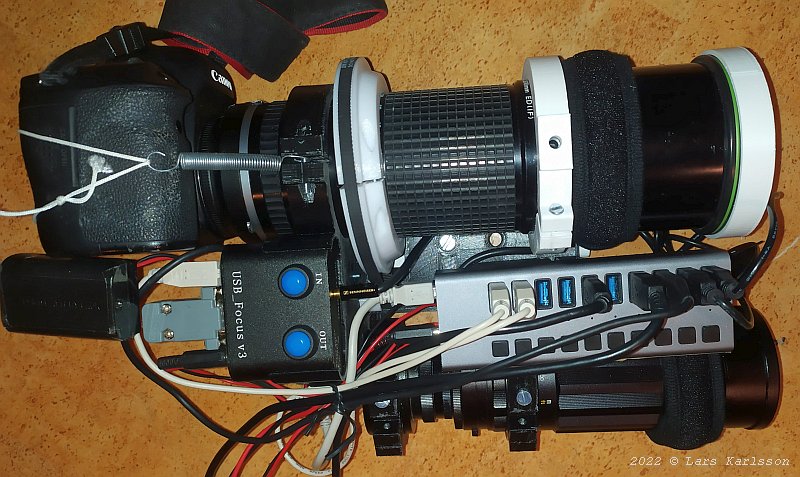
The HUB is planned to be placed between the lenses as it was before. But now a new orientation to get better access to the on/off push buttons. All the USB cables must also get free from near laying devices. Above all this a handle will be designed to make it more practical. 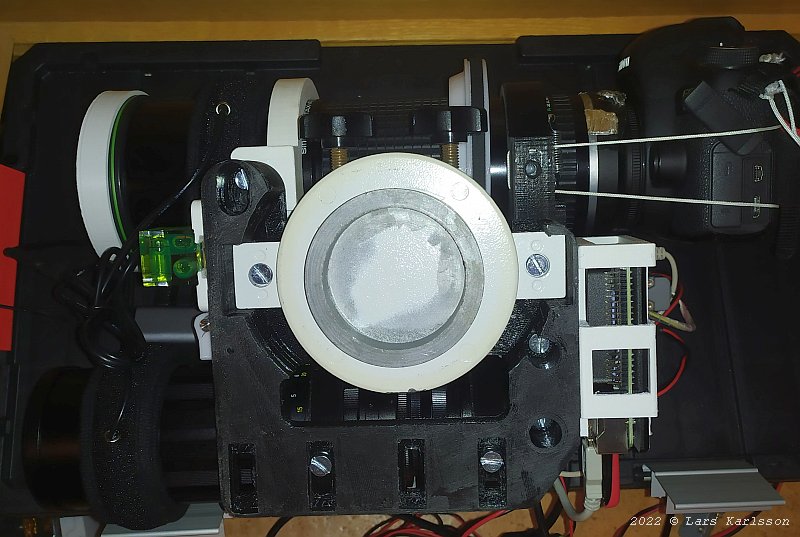
The bottom side, the top pad from the EQ6 mount is installed to verify that it's space enough around it. To sit at the balance point it has to be moved 5 mm to the right, still there is room to move it further. All screw heads are countersunk into the bracket so they don't stick out. This gives a flat bottom and make it more practical when working on it on the desk. HUB Brackets: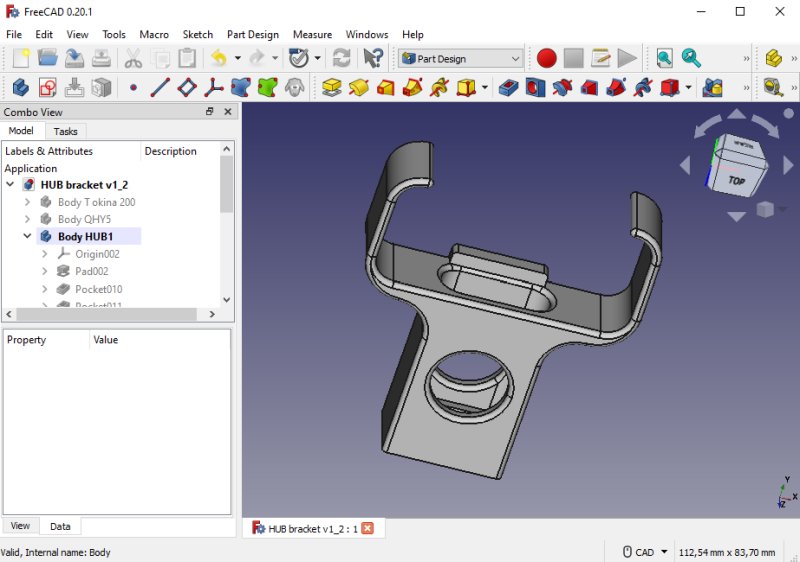
Now when I have separate the guide telescope bracket and the HUB bracket it more easy to fit them in the available space. There are two of them, only difference is that one of them have a stop block as the one above. 
This bracket is adjustable sideways to get it in line with the space between the lenses. 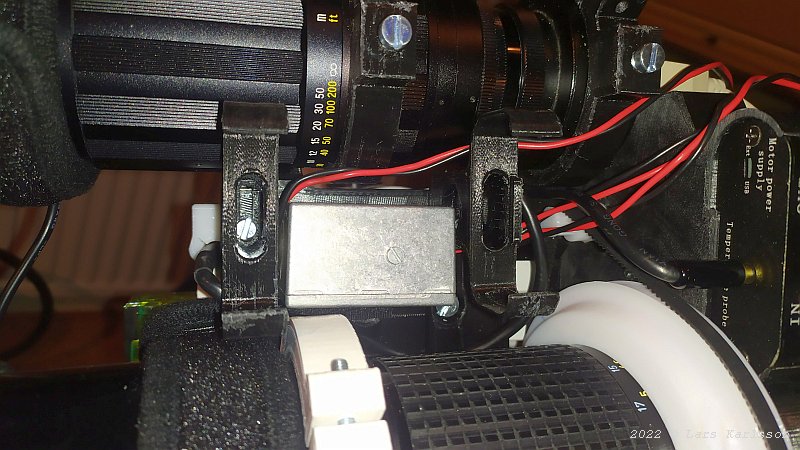
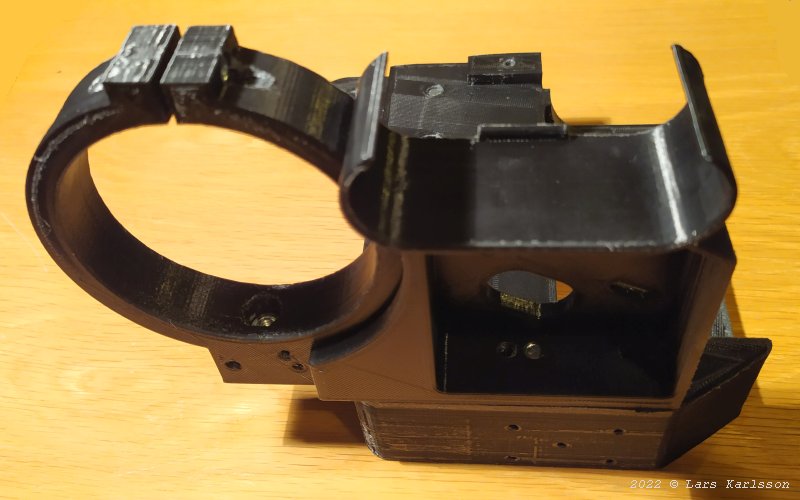
The two HUB brackets installed and in between the 12 to 8 Volt converter. 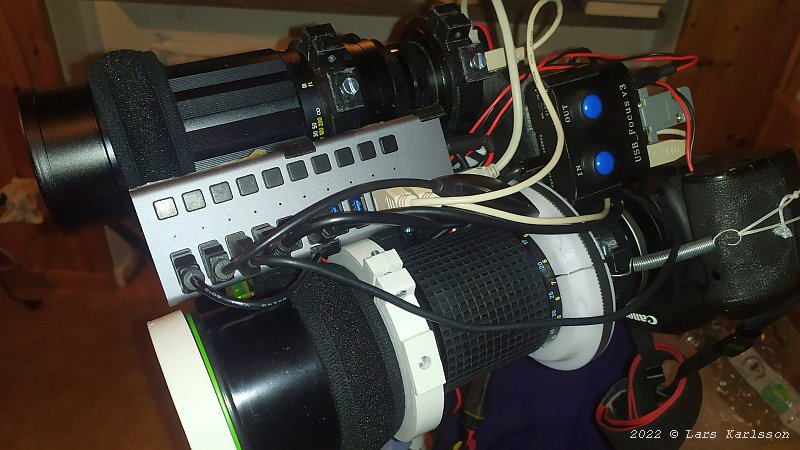
The 12 Volt powered HUB inserted in the brackets opening. Fits perfect but all the cables is a problem. Later I will design a handle that connect to each lens, it will help a lot installing it on the mount. Checking clearence: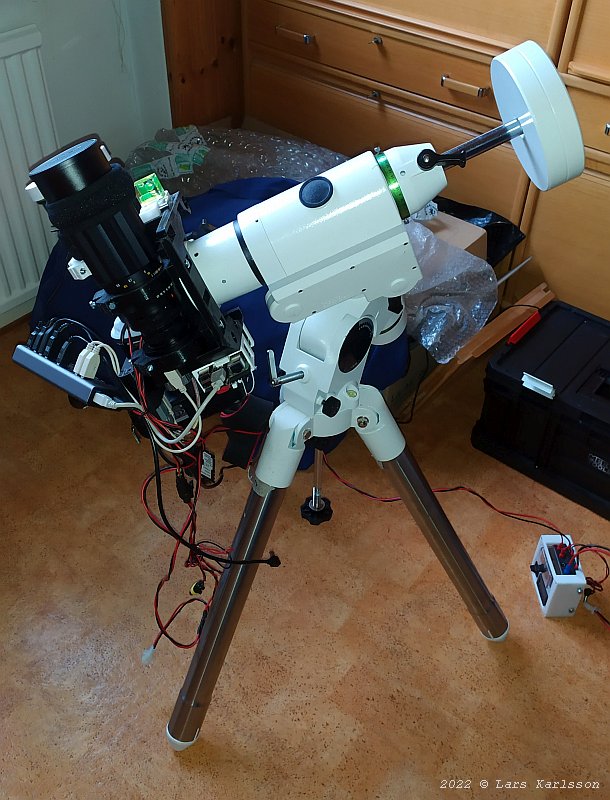
It's important to check that nothing hit the camera or other device when the mount moves to different position. This is the extreme position without doing a meridian flip. It can move 45 degrees after passing the meridian without a problem. That is three hours, if I delay the meridian flip with 2 hours I'm on the safe side. 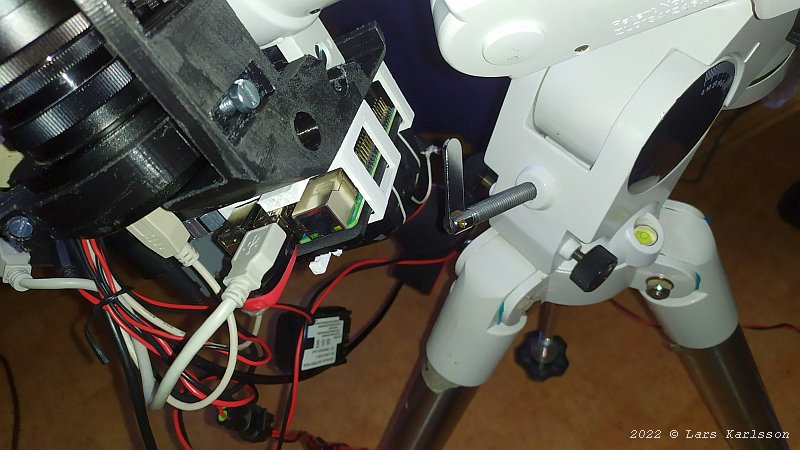
It's the latitude adjuster it hit, if I replace it with a shorter screw it's almost possible to move a 360 degree revolution. The camera and accessories earlier took a space of 15.7 liter, now I can fit it an a shoebox of 14.8 liter. Totally with mount, tripod, battery and camera it take a box of 59.8 liter and a weight of 23.8 kg. The goal is 20 kg or lower, if I replace the counter balance with the battery as a counter balance I'm there.
|
|