|
Advertisement / Annons: |
Tutorial:
|
Content:
Note: |
1.2, Background subtraction, difficult case:This time I take a comet photo I took 7 years ago with heavy light pollution and not so good optics. In that time I hade a Pentax 500 mm f/4.5 lens, I had a lot of fun with this lens, but it was not an APO construction and it handled the colors bad. It also had a complicated vignetting pattern when used with a full frame camera, the Canon 5D (Mk I). It will take 106'000 years until the comet is back and I can take a new better photo. The problem is, I'm maybe not alive then. I have to do something with this photo I already have. What will happen if I use the same technique that I used for the M45 Open cluster ? Test object comet Panstarrs C/2011 L4: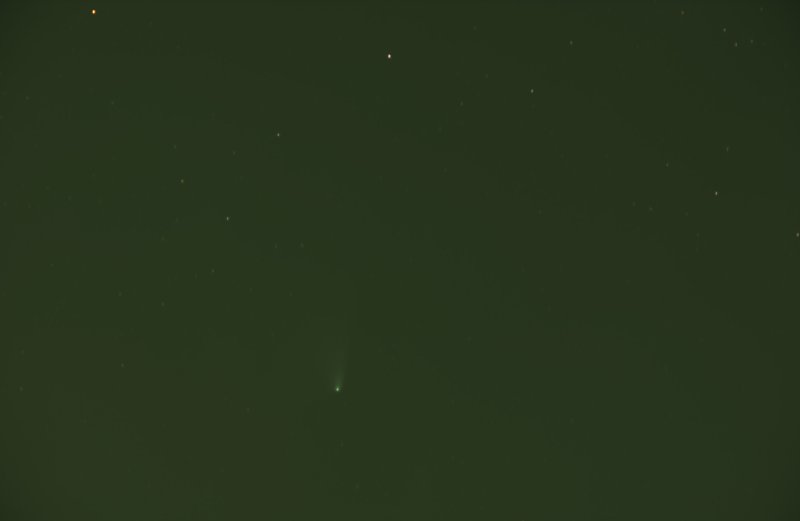
This is what I start with, a calibrated stack of 20 photos of 60 second at ISO1000 each. My flat image was of poor quality and I made a new synthetic flat. Already before I increase the contrast the light pollution is visible. Subtraction with Despeckle filter: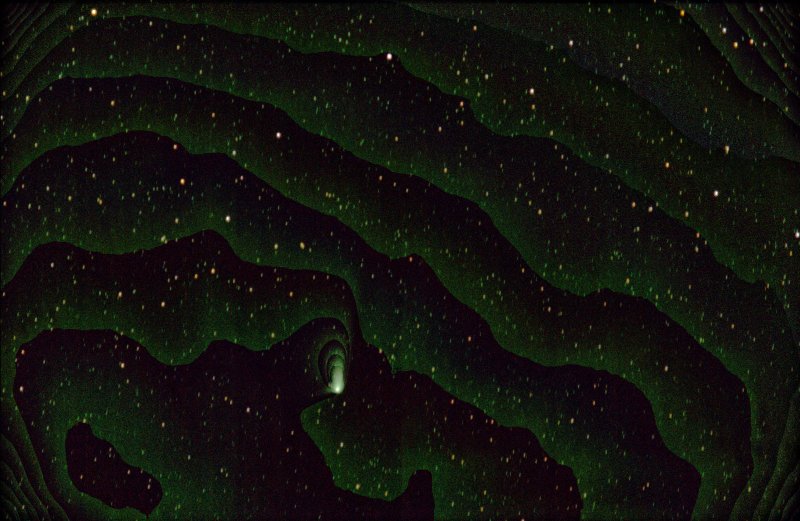
This was the result with the earlier method, very strange, it looks as if the bit depth is to low. I check the precision of the Despeckle layer, but it says 32 bit floating point. This can't happen, something went wrong. This old Canon camera only has 12-bit raw files, in effective about 3700 distinct levels. But with 20 images stacked together with the noise it should not show up like this. Below I try some different technique to get rid of this pattern and also get a flatter image. Still working on the details.
Note: Open the rgb files with careful adjusting of the levels: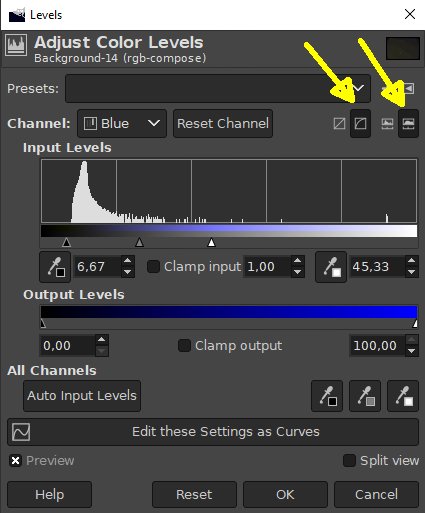
I start from the beginning once again. It looks as some step in the process it doesn't work with 32 bit. Then it's important that the incoming levels are correctly set. The two yellow arrows point were there is possible to configure the histogram to be in logarithmic mode. With this kind of images it helps a lot. The new image: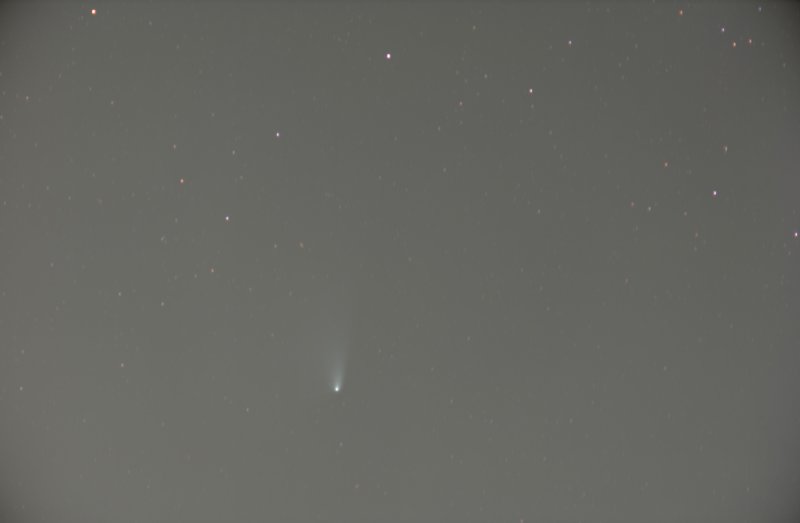
Now it looks better, the traces of banding we could see at the first image is gone now. Analyze the gradient: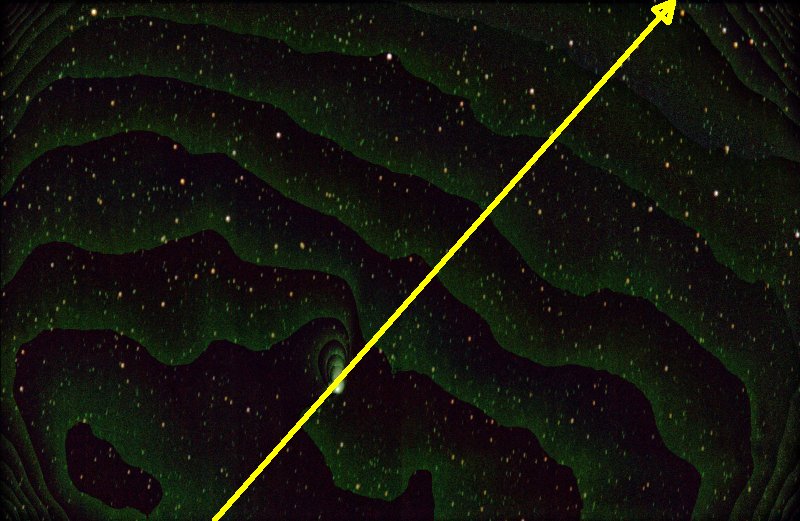
If we go back to the earlier subtracted Despeckled image we see something interesting. The light pollution makes a diagonal gradient, follow the yellow arrow. It's like a staircase. That's something we can use to get a first coarse subtracting of the background. Prepare for a gradient image:
Make a copy of the layer and set that active as we did earlier. Set the background color with the eye dropper. Click in the yellow ring below where the lowest (darkest) point is in this image along the yellow arrow. Do it once again for the foreground color, click in the red ring. Set color at start and end point of gradient: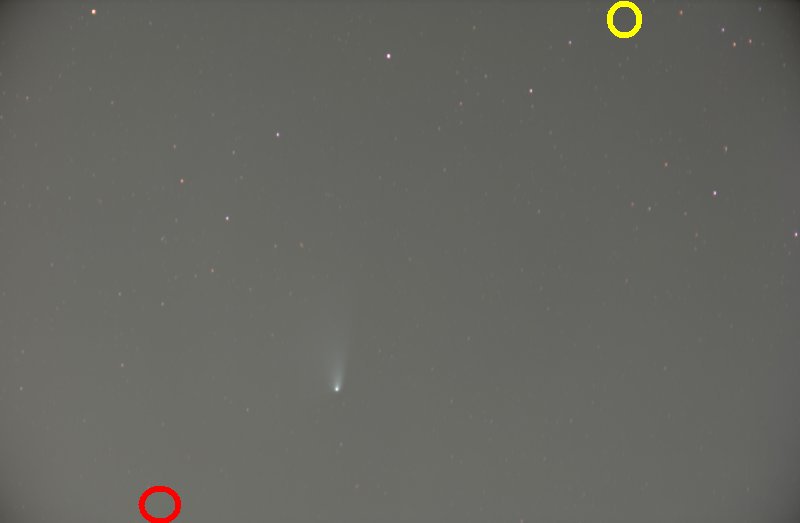
To make a gradient image we need to know what levels it have at the start and end points, that's what we did above. Make the gradient image: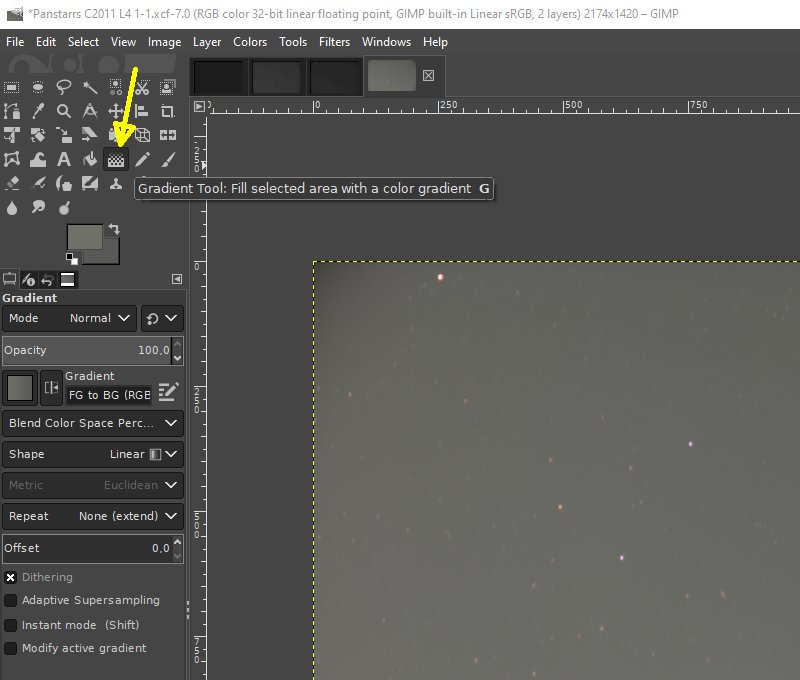
Select the gradient tool. Draw the gradient line: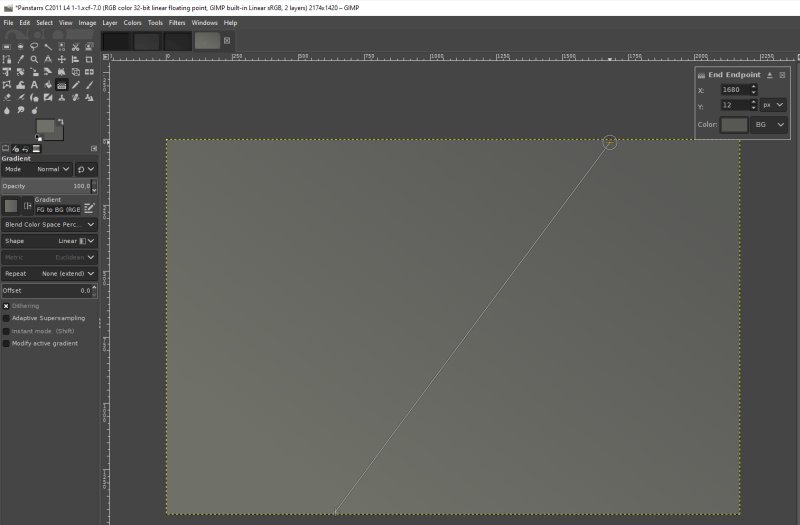
Draw the gradient line, start where it is brightest, foreground color and draw it to the end point where it is weakest, the background color. Subtract the gradient image: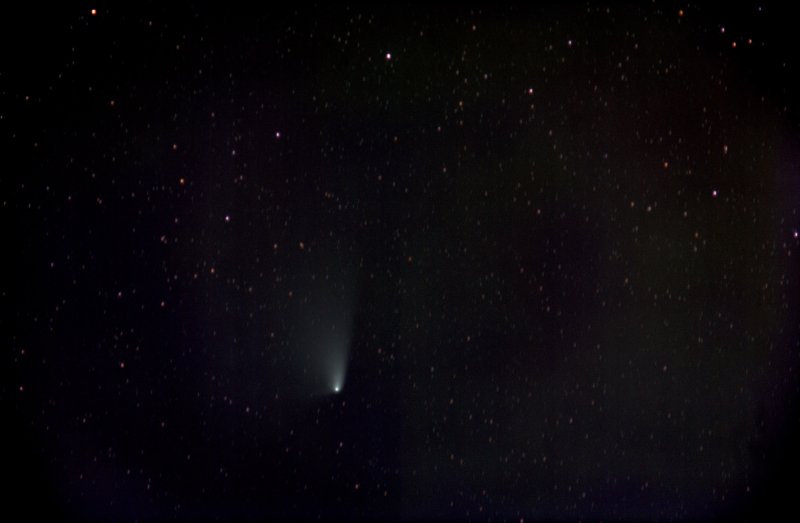
Subtract the gradient layer as we did earlier with the Despeckled layer. As you see it is now much better when we have removed the tilted background. Now it's easier to separate the comet and do a new subtraction, one or more subtractions dependent how the object looks. The comet's dust tail point upwards, the dust tail is normally white, the nucleus more green and if there is a plasma tail it's normally blue. To the right is a big blob of some green light polluted stuff. Coming back later how I proceed from here. Much to learn first how to handle this complicated case with all its light pollution.
|
|